


Path of Exile 3.29 Curse of the Allflame arrives with a fresh league mechanic focused on seafaring voyages, a new crafting system, and sweeping changes to core endgame systems including Abyss, Legion, Talismans, and gem sockets. Planning your Atlas passive tree and mapping route matters more than ever if you want to progress the Atlas quickly, farm currency efficiently, and set yourself up for endgame content. This guide serves as a structured reference to help Path of Exile players plan their Atlas passive tree and map farming strategy for both Trade and Solo-Self Found (SSF) in the Curse of the Allflame League (Patch 3.29). You'll find optimal tree routes, mapping tricks for smoother Atlas progression, early-game mapping setups, and mid-to-late game strategies for farming currency and completing your Atlas.
Updated on July 29th based on the testing after PoE 3.29 launched!
PoE 3.29 Best Farm Strategy Guide - Early, Mid, End League Atlas Tree & Map Plans
With Path of Exile 3.29: Curse of the Allflame, the endgame mapping experience receives targeted iterations on the sweeping 3.28 Mirage rework rather than another full redesign. The 3.29 patch refines the system while adding Atlas Anomalies, rebalancing several league mechanics, and adjusting map pools. The endgame remains flexible, but with fresh currency items, reworked reflect mods, and new farming loops to plan around.
Main Changes to Atlas & Maps in Path of Exile 3.29 Curse of the Allflame
The 3.29 update brings substantial changes to the endgame Atlas and mapping systems:
1. Atlas Anomalies Replace Random Map Encounters – Strange locations now manifest on the Atlas, labeled by Kirac as Anomalies. After completing maps affected by a Voidstone, an Anomaly may appear when you next open your Atlas. These don't require a Map item to enter, aren't affected by your Atlas Passive Tree, and can't be augmented with Fragments. Reflecting Mists and the Nameless Seer no longer randomly spawn within maps, they only appear in these Anomaly areas.
2. Reflect Map Modifiers Reworked to Thorns – The old reflect mods that caused monsters to reflect a percentage of physical or elemental damage are gone. Rare Monsters now gain Physical or Elemental Thorns when hit, lasting for 5 seconds and reflecting a fixed damage amount. In Red Tier Maps, Rare Monsters have Physical Thorns reflecting 800 Physical Damage and Elemental Thorns reflecting 1500 Elemental Damage. Thorns damage can be mitigated through Evasion, Block, Armour, and Resistances.
3. Map Pool Adjustments – The Atlas received a big rotation of maps. Added back: Arachnid Nest, Basilica, Bazaar, Caldera, Cells, Channel, Colonnade, Colosseum, Conservatory, Crystal Ore, Desert, Desert Spring, Estuary, Forbidden Woods, Geode, Infested Valley, Laboratory, Malformation, Museum, Phantasmagoria, Pier, Plateau, Ramparts, Stagnation, Sunken City, Temple, Toxic Sewer, and Vault. Removed: Acid Caverns, Arena, Ashen Wood, Bog, Canyon, Carcass, Castle Ruins, Courtyard, Coves, Crimson Temple, Crimson Township, Cursed Crypt, Defiled Cathedral, Dig, Dry Sea, Dungeon, Lava Chamber, Lighthouse, Maze, Moon Temple, Mud Geyser, Necropolis, Pen, Racecourse, Sepulchre, Underground Sea, Wasteland, and Wharf.
4. New Scrying Orb Currency and Altered Prophecy Cluster – A new Atlas Passive cluster called Altered Prophecy has been added. The Notable grants T14+ Maps a 4% chance to drop a Scrying Orb on completion, and small Passives grant increased chance to drop Divination Cards. The Scrying Orb stores the map it was found in and lets you Scry that map's Divination Cards to another Map on your Atlas.
5. Gem Socket System Reworked – Gems can now be socketed into any equipment socket regardless of color. Matching gem color to socket color gives +10% Quality bonus. Sockets are White by default with a small chance to roll Red, Green, or Blue based on item level. Chromatic Orbs are much rarer, no longer sold by vendors for Jewellers, and force one Non-White socket while the rest roll normally.
6. Reflecting Mists Reworked – Reflecting Mist objects have a much higher chance to drop a Reflecting Mist Currency item. The average Modifier Effect applied to Explicit Modifiers when using Reflecting Mist Currency has been reduced (Mirrored Jewellery from Reflecting Mist objects is unaffected). The Enshrouded Astrolabe has been renamed to Deceptive Astrolabe.
7. Legion Revamp with Enshrouding Crystals – The Domain of Timeless Conflict now has four Crystals of Permutation. Enshrouded items placed inside can transform into another Unique of the same item class, keeping a Vestigial implicit modifier from the original. Legion Generals drop new Enshrouding Crystals (Karui, Imperial, Maraketh, Templar, Vaal) that can Enshroud Unique items. Incubators are removed. Timeless Splinters now drop only from Sergeants, Generals, and Legion chests, but in larger stacks.
8. Abyss Revamp – Abyssal Pits and cracks are already open before you approach. Slaying nearby enemies sends their souls into the pit, and the Abyssal legion pours out once enough enemies fall. Abyss is now the exclusive source of Abyssal Jewels and Stygian Vises. A new Abyss Endgame Pinnacle Boss has been added with its own unique items. Abyssal Delirium Orbs are removed.
9. Talisman Revamp – Talismans now have special Enchantment Modifiers rather than Implicit Modifiers, and drop uncorrupted. They drop from Red Beasts or Bestiary Bosses and are tied to specific Beasts. Talismans cannot be Anointed, and their enchantments cannot be removed at the crafting bench. Unique Talismans are no longer in the core drop pool.
10. New Mercenary System and Luminary Ascendancy – Mercenaries of Trarthus are now core content from Act 3 onwards. They no longer count as party members, so they won't bloat monster life or reduce your solo loot rate. The new Luminary Ascendancy for the Scion can permanently hire up to 3 mercenaries with fully customizable gear.
11. Endgame Boss and Fragment Changes – The Decayed Voidstone socket now connects to the Forge of the Phoenix, Pit of the Chimera, and Lair of the Hydra in addition to the Maze of the Minotaur. The Pit of the Chimera Boss now spawns only one wave of enemies per phase. Memory Thread Maps now display which Map they open.
These changes reshape both league start progression and mid-league juicing. Now let's look at how to move through the new Atlas and get your Voidstones quickly.
PoE 3.29 Fastest Atlas Progression & Unlock 4 Map Voidstones (League Start)
At league start, your primary goal in the Atlas is to socket all four Voidstones as fast as possible so every map becomes T16. This maximizes both map drops and currency potential. The best progression path is route-based, focusing on boss objectives in each Atlas quadrant.
Step 1: Plan Your Atlas Passive Tree for Map Sustain
Spend your first Atlas passives on Shaping nodes near your starting location. Grab all nearby shaping nodes on the left, bottom, and top right. Next, get early Shrine clusters, they provide speed and survivability, which helps clear speed and boss fights. Skip early monster mechanic nodes (like Breach, Legion, and so on) until you have solid sustain and at least 2 Voidstones.
Step 2: Bottom-Left Quadrant First for Exarch & Eater Progress
Focus your map completion on the bottom-left quadrant early. This zone lets you reach Searing Exarch and Eater of Worlds, the two easiest and least gear-dependent Voidstones.
Progress your Atlas straight toward your T16 target map, run adjacent maps, and prioritize new map completions.
If duplicates drop, still run them but branch toward your T16 goal.
Once boss invitations appear (blue/purple icons), slot the correct anointed altar in the map device (Exarch or Eater) to progress the respective quest.
You must run these quest chains in this region; don't waste time in other corners early on.
Kill both Exarch and Eater bosses as soon as possible for your first two Voidstones.
Step 3: Top-Left Corner for the Originator/Replica Voidstone
After 2 stones, the game gives you the Originator questline. You need to run three chains of 4 maps each, usually in T14–16.5 content. These final 4 maps are T16.5 "Uber" maps, run them white (unrolled) to avoid dangerous mods that could brick a portal. After 3 chains and the final fight, you get your third Voidstone.
Step 4: Top-Right Quadrant for Shaper & Elder Voidstone
Complete the top-right region and push up to T16 Marshes.
For Shaper:
Open the map device and socket the 4 Shaper Guardian Fragments (they drop as you run influenced maps).
Defeat each Guardian to get the fragments, then fight Shaper.
Do NOT Maven Witness the Shaper fight, it's unnecessary difficulty for no real reward.
For Elder:
Influence any 4 T14+ maps with Elder influence, run those to get the fragments.
Defeat Elder when you have all four.
Again, do not Witness him.
Completing both gives you Voidstone #4.
Step 5: Bottom-Right for the Maven Voidstone (Save for Last)
The Maven is the hardest Voidstone and requires more gear preparation. Progress the Maven questline by running invitation encounters, then push toward T16 Silo. Socket the Maven fragment and fight her there. Upon winning, socket your final Voidstone.
Save Maven for last since she's the most mechanically demanding fight for day 1–2 gear.
Step 6: Order of Voidstones
The order of collection should be:
1st: Searing Exarch or Eater of Worlds (easiest, opens up Exarch altars for early currency)
2nd: The Originator (allows Astrolabes to drop from Atlas bosses)
3rd: Shaper & Elder (buyable if your build isn't strong enough)
4th: Maven (final, hardest push)
Step 7: Efficient Map Running Habits
When entering a map, prioritize the map boss first, killing the boss most often drops another map. Once the boss is down, check for a shrine and any league mechanic. If none of these grant a map drop, exit and run the next highest-tier map. Don't waste time on side content until you've stabilized map sustain and reached red tiers safely.
Core rule: always run the highest map tier available, get to T16 fast, and don't over-invest in mechanics before your build can handle them.
PoE 3.29 Best Atlas Tree & Mapping Plans for Trade League (To Be Updated)
For those playing in trade-enabled leagues, mapping strategies often center on rapid currency generation and crafting items to sell. Trade league players should pivot their trees toward the most in-demand loot as the league progresses, shifting from general sustain to specialized routes for maximum returns.
With 3.29's changes to Abyss, Legion, and other league mechanics, farming strategies will look different from 3.28 Mirage. Full trade league farming strategies for 3.29 will be updated here after league launch once scarab prices, mechanic profitability, and Atlas tree interactions have been tested. Below is the first strategy setup for early mapping.
1. PoE 3.29 Atlas Tree Setup for Early Mapping
The early Atlas plan in 3.29 focuses on map sustain, fast progression, and safe rewards without making maps overly hard in the first days. With the Abyss and Legion reworks, changes to Breach, and new content like Atlas Anomalies, your early tree should quickly advance your Atlas, get you higher-tier map drops, and provide strong utility like Shrine bonuses.
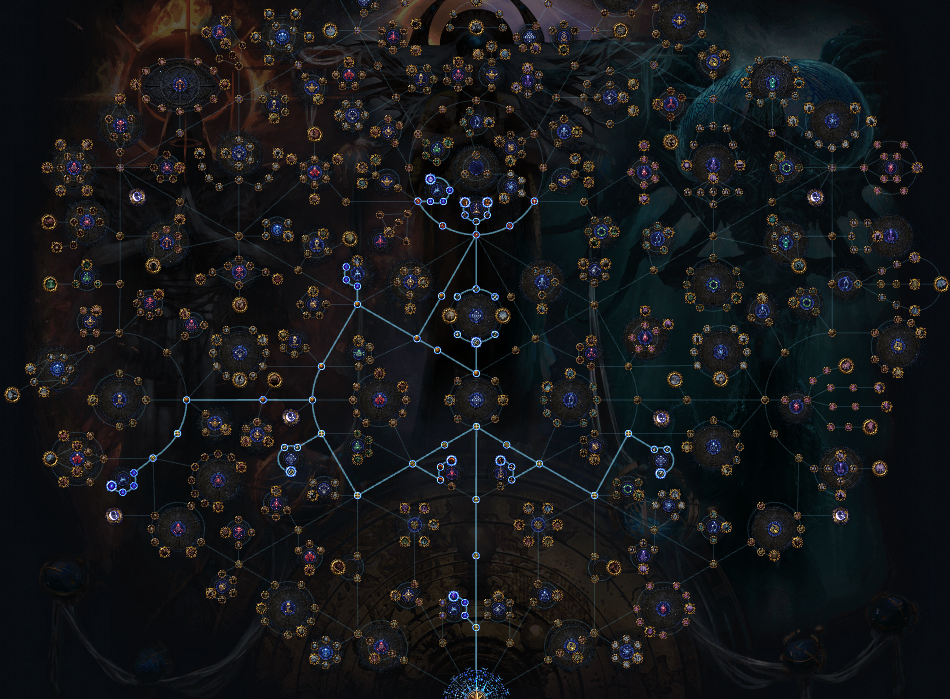
1. Take Map Sustain and Progression Nodes First
Path through the Shaping Node Trio near your Atlas start:
Shaping the Mountains: +10% more rare monsters in maps
Shaping the Skies: +10% more magic monsters in maps
Shaping the World: Map boss has a 5% chance to drop an extra map one tier higher
These give roughly 50% increased chance for map drops to be one tier higher and add more monsters (helping early map drops and sustain).
2. Grab Early Utility: Shrines
Take the "free shrine" node (guaranteed shrine in every map, increased duration).
Add extra shrine duration and/or shrine effect nodes as available.
Shrines give large speed, survivability, and damage buffs — great for early progression and boosting your first few T14–T16 runs.
3. Consider the Altered Prophecy Cluster
New in 3.29, this cluster grants a chance for T14+ maps to drop a Scrying Orb on completion.
Small passives increase Divination Card drop chance in your maps.
Worth allocating once you're running T14+ regularly if you want targeted div card farming later.
4. Block Unwanted League Mechanics Early
Early blocks: Breach (nerfed this league), Legion (until you can enshroud), Expedition, Harvest, Abyss.
Optionally block Heist, Ritual, Delirium later based on your build and goals.
Blocking increases the spawn rate of mechanics you actually want and keeps your maps less cluttered.
5. Take Scarab and Quantity Nodes
Small and medium Scarab nodes are worth grabbing early — scarabs are valuable at league start and don't make maps much harder.
Delay "Map Effect" wheels or heavy quant/rarity passives at the center of the tree until your gear can handle juiced maps.
6. Prioritize Progress, Not Juice
Aim for easy map completion first: progression and filling your Atlas is more valuable than juicing for max loot early.
Take only 31–35 points on your first pass so you have flexibility to adjust as you see how league mechanics and map sustain are performing.
7. Test and Adapt
Once your early path is set, adapt based on what you enjoy:
Want more shrines? Take more shrine nodes.
Scarab prices dropping or you don't want them? Re-path as needed.
Start taking Altars (Eater or Exarch) and quantity/rarity bonuses once you've reached red maps and are confident in your build.
Sample Early Atlas Tree Priorities:
Shaping the Mountains, Skies, and World
Early Shrine wheel (free shrine, duration, effect)
Block unwanted league mechanics
Take Scarab and utility nodes as available
(Later) Progress to Altars, pack size, and juice wheels once you're comfortable with red maps
2. PoE 3.29 Ethereal Allflame Atlas & Farm Strategy (Headhunter & Currency Printing)
The Ethereal Allflame farm is one of the most explosive currency strategies in 3.29 and is powerful enough on its own to bankroll a Headhunter purchase on day one. The core concept exploits the new Ethereal Allflame Ember mechanic: when applied to a map, it substitutes monster packs with Ethereal monsters that cannot drop equipment, flasks, or tinctures, meaning they exclusively drop currency, Scarabs, and maps. Combine this with Betrayal Scarab of the Allflame (which scales the number of Ethereal monsters), Horned Scarab of Bloodlines, and an 8-mod juiced T16.5 Originator map, and every map becomes a currency explosion. Expected profit is roughly 42 Divines per hour on average runs, with a 10-minute test run producing 7+ Divines in raw currency plus another 160+ Chaos from map sales alone (which aren't tracked by tools like Wealthy Exile). The main downside is that Ethereal monsters are extremely dangerous on T16.5 Originator maps day one, and the Allflame Ember price fluctuates wildly (from 100 Chaos to significantly higher as more players discover the strategy), so factor in current market prices before committing. This farm pairs incredibly well with Replica Headhunter and Inspired Learning since it scales heavily off magic monster mods, and the strategy only requires roughly 20 Chaos per map in total input cost when Ember prices are stable.
1. Check Ethereal Allflame Ember Price
Check the current market price of Ethereal Allflame Embers before starting. When Embers are under 100 Chaos each, the farm is highly profitable. If prices spike above 200 Chaos due to demand surges (usually after streamer showcases), reduce your run frequency or pivot to another strategy temporarily until supply normalizes.
2. Build the Atlas Tree
Focus exclusively on currency, Scarab, and map drop nodes since Ethereal monsters only drop these three item types. Take all currency drop nodes, all Scarab drop nodes, and all map drop nodes. Critically, take the Eater of Worlds Atlas tree nodes, Eater of Worlds monsters are essential to making this strategy work at its full potential. Skip loot filter noise like unique drop nodes or Divination Card nodes since they don't interact with Ethereal packs.
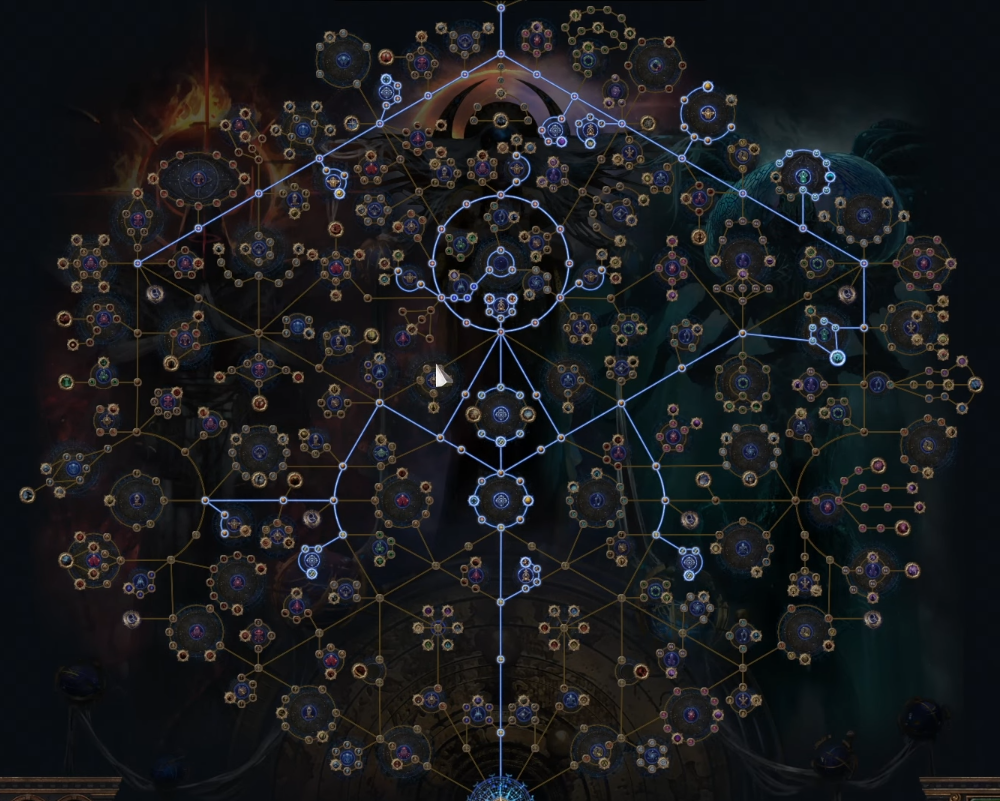
3. Take Shrine Nodes for Survival
Allocate the full Shrine cluster (guaranteed shrine, increased duration, increased effect). Day one characters aren't strong enough to handle Ethereal monsters on juiced T16.5 Originator maps without help, and Shrines provide the survival and damage buffs needed to clear safely.
4. Set Up Scarabs
Slot Betrayal Scarab of the Allflame (mandatory, scales Ethereal monster count). Add Horned Scarab of Bloodlines (magic pack size scaling). Fill remaining slots with Scarabs that boost currency, Scarab, or map drops. Every Scarab slot should push one of the three loot categories Ethereal monsters can drop.
5. Buy the Right Map
Purchase a T16.5 Originator 8-mod corrupted map with high Item Quantity, Pack Size, Map Drops, Scarab Drops, and Currency Drops. Use weighted-sum trade search: prioritize Scarab drops first, map drops second, currency drops third. Expect to pay between 5K and 35K Chaos per map depending on stat rolls (20K Chaos is the sweet spot for balanced returns). Recommended layout: Jungle Valley, since you don't need to kill the boss to spawn Eldritch Altars.
6. Gear Up for Survival (Recommended)
Equip Replica Headhunter and/or Inspired Learning if possible, both scale off the magic monsters this strategy generates. Two Timeless Jewels with "steal modifiers from rare monsters" (weaker Headhunter substitutes) also work well as a budget option. These items massively improve your survivability and clear speed against Ethereal monsters.
7. Enter the Map & Take Eldritch Altars First
Once inside, do NOT kill Ethereal monsters immediately. Run past them and prioritize spawning and activating Eldritch Altars first by killing regular (non-Ethereal) monster packs. Eldritch Altars with Eater of Worlds modifiers (like "25% chance to duplicate maps/Scarabs/currency dropped by slain monsters") multiply your entire loot pool.
8. Take All Altar Downsides
Accept every Altar downside, even the harsh ones. The upsides (duplication and quantity boosts) massively outweigh the risk. Build accordingly so your character can survive the downsides, this is where Replica Headhunter and Shrine buffs carry you.
9. Kill Ethereal Monsters Last
Only after activating all available Eldritch Altars, return to the Ethereal monster packs and kill them. Their drops will now be duplicated by your Altar effects, creating loot explosions of Scarabs, maps, and currency across the ground.
10. Loot Carefully with Portal Management
Once your inventory fills, portal back to town, empty into stash, and return using multiple portals to finish looting. Reserve at least 3 to 4 portals per map purely for looting since Ethereal monster drops are dense enough to require multiple trips. Do not die during looting, remaining monsters (especially non-Ethereal packs) will still kill you and cost you portals plus dropped items.
11. Sell Maps in Bulk
Return to hideout and pull all dropped maps from stash. List T16 Originator and regular T16 maps at 3 Chaos each in bulk (they sell instantly). List Nightmare maps individually at 45 Chaos each. Map profit alone typically accounts for 150 to 250 Chaos per run, which is a huge income source that most players overlook.
12. Sell Scarabs & Currency
Bulk-sell cheap Scarabs in stacks of 20 or 100 for fast turnover. List expensive Scarabs (Legion Scarab of Command, Cartography Scarab of Duplication, etc.) individually. Convert raw Chaos to Divines strategically based on the current Chaos-to-Divine ratio.
13. Minmax Over Time
Item Quantity, Pack Size, Map Drops, Scarab Drops, and Currency Drops are all multiplicative in this strategy, so squeezing every extra percentage point compounds significantly. As you build wealth, invest in better-rolled Originator maps (30K+ Chaos maps) and consider swapping Horned Scarab of Bloodlines for higher-tier alternatives if your build can handle the additional monster density.
3. PoE 3.29 Altars & Go Atlas & Farm Strategy (Raw Chaos & Divine Engine)
The Altars & Go farm is the most reliable day-one strategy in 3.29 because it requires essentially zero Scarab investment while generating massive amounts of raw Chaos (or raw Divines via Blue Altars). Raw currency has enormous buying power in the first 48 hours of the league, with Chaos-to-Divine ratios sitting around 90 to 1, meaning every Chaos you drop is worth substantially more than it will be a week later. The setup is dead simple: run maps with maximum pack size, take every Altar node on the Atlas tree, and let the raw currency rain down as you clear. This strategy scales directly with your clear speed rather than gear investment, which makes it ideal for fast mappers like Winter Orb Elementalist, Kinetic Blast, and Val Ice Nova. You can run either Red Altars (raw Chaos) or Blue Altars (chance at raw Divines from Elderslayer Ichor bosses) depending on current Ichor market prices, and you can optionally add Mercenary encounters to check Trarthus inventories for Divine drops or Consecrated Mercenary listings.
1. Pick Red or Blue Altars
Choose Red Altars for consistent raw Chaos income when the Chaos-to-Divine ratio is above 90 to 1. Choose Blue Altars for a chance at raw Divine drops when Elderslayer Ichor prices are elevated. Blue Altars are also safer overall since Blue downsides tend to be less lethal than Red downsides.
2. Build the Atlas Tree
Take every Altar node in the tree, focusing on max pack size and full Altar effect. Grab all Altar effect passives around your chosen Altar type. Do NOT take Red Altar downsides unless you're CI or extremely tanky, since the downsides can one-shot squishier builds.
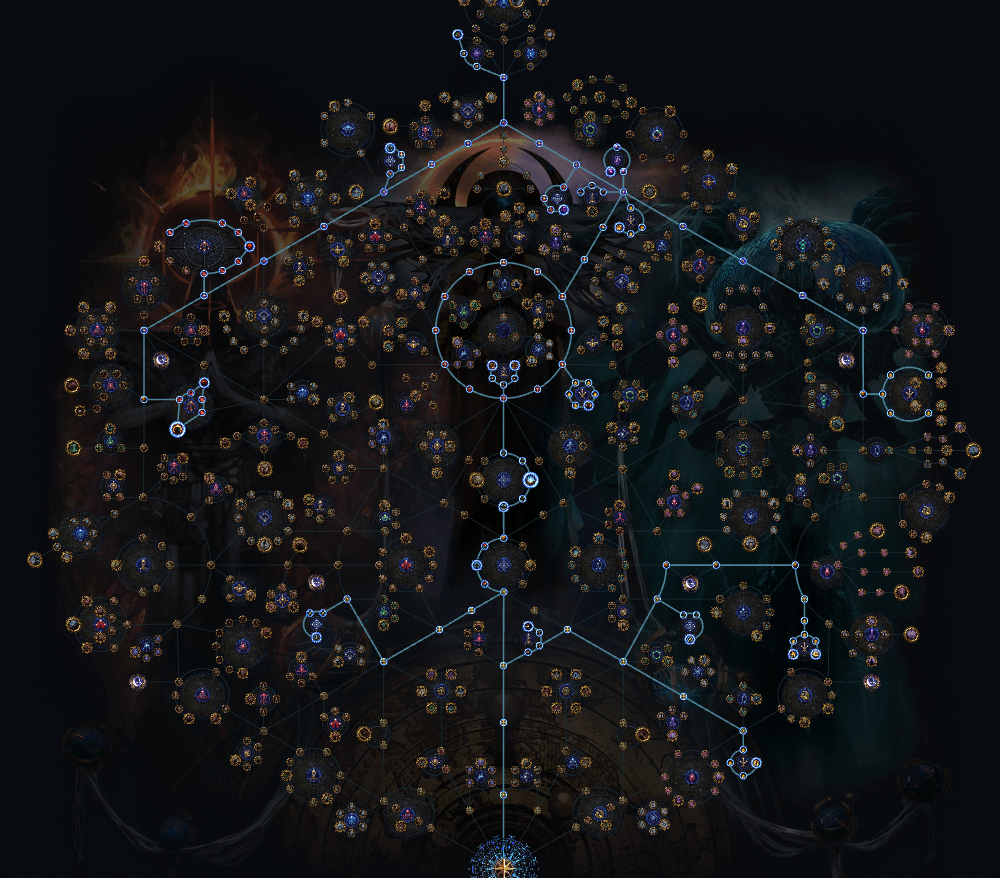
3. Add Boss & Divination Nodes
Path into the Shaper and Elder boss nodes since Altar maps naturally kill a high volume of bosses per hour. Grab the Conquerors and Vivid Memories cluster for extra passive currency from map bosses. Optionally, take the Divination Card wheel if you plan to run maps that drop good divs (Dunes, City Square, Cemetery).
4. Optionally Take Mercenary Nodes
If you want to try Trarthus Mercenary farming as a side income, allocate the Mercenary wheel. This gives you a chance every map to find a Consecrated Mercenary or a Divine Orb in the merc's inventory. Skip these nodes if they slow down your maps.
5. Choose Your Map
Dunes is the top pick due to open layout plus natural Divination Card synergy. Cemetery, City Square, and Beach also work well. Run T16 with basic Alch and Go since Altars provide most of the loot without needing juiced mods.
6. Execute the Map
Enter the map, rush the boss, and hit every Altar you spot on the way. Aim for 60 to 90 second maps for maximum Altars per hour. Pick up all Chaos and Divines and stack them for bulk conversion later.
7. Convert Currency at the Right Time
Hold Chaos during the first 48 hours when the Chaos-to-Divine ratio is most favorable. Only convert to Divines when you're ready to make a major build upgrade purchase.
4. PoE 3.29 Legion Atlas & Farming Strategy (Enshrouding Crystal Jackpot with Big Caveats)
Legion in 3.29 is a mixed bag based on early testing, and it needs a very specific setup to be worth running. The core issue is that Incubators have been removed from Legion drops, which was one of the primary raw-currency payouts in previous leagues. Without Incubators, low-investment Legion farming (Alch-and-Go with no Legion Scarabs) feels significantly worse this patch and is difficult to recommend. However, if you can secure Legion Scarabs (specifically Legion Scarab of Command plus Legion Scarab of Eternal Conflict, or Ritual Legion plus Add 5 Legion Sergeants), Legion becomes decent again thanks to the new Enshrouding Crystal drops from Legion Generals. Enshrouding Crystals let players transform Unique items into other Uniques of the same slot while carrying over a Vestigial implicit modifier, so demand is extremely high in week one. In short: Legion is a Scarab-gated farm this league, not a low-investment strategy, and it should be skipped entirely if you can't afford proper Scarab investment.
1. Verify Scarab Prices Before Committing
Check Legion Scarab of Command and Legion Scarab of Eternal Conflict prices before starting. If they cost more than 8 to 10 Chaos each, skip Legion entirely and pivot to Altars & Go or Nightmare Map Farming. Legion without Scarabs is not worth running.
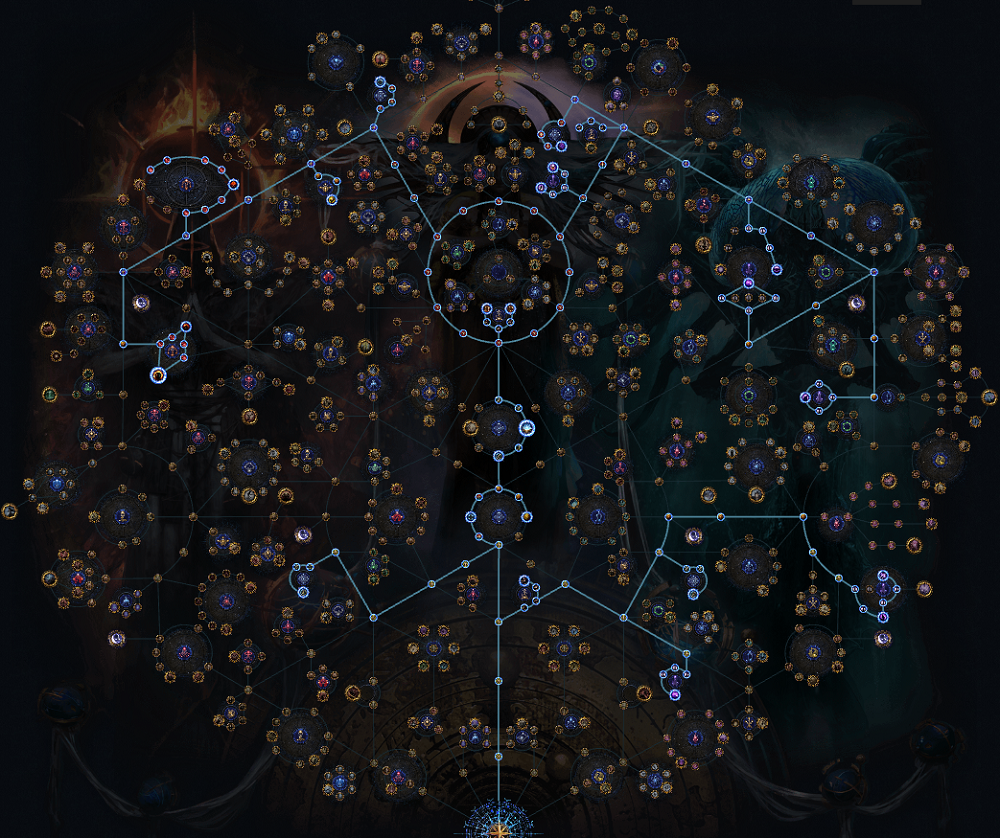
2. Build the Atlas Tree
Take all Legion cluster nodes including Sergeants, Generals, extra Timeless Monsters, and increased Legion Splinter drops. Grab the Shaping trio (Skies, Mountains, World) for baseline monster density. Take the Ritual Legion notable plus the Add 5 Legion Sergeants notable if pathing allows, these are the two most impactful Legion nodes in the tree.
3. Block Competing Mechanics
Block Breach, Expedition, Ritual, Delirium, and any other mechanics you don't want cluttering your maps. This dramatically increases Legion spawn rates and keeps your maps focused on Legion loot.
4. Set Up Scarabs
Slot Legion Scarab of Command (guarantees a General spawns in every Legion, this is the most important Scarab for Enshrouding Crystal drops). Add Legion Scarab of Eternal Conflict if affordable (adds an additional Legion encounter to the map). Fill remaining slots with generic Scarabs (Cartography or Divination) based on your build's clear speed.
5. Choose Your Map
Run T16 maps with open layouts (Dunes, Cemetery, City Square, Beach). Avoid tight indoor layouts where Legion monsters get stuck behind terrain. Roll for increased Pack Size and more monsters mods since Legion scales heavily with total monster count.
6. Execute the Map
Rush to the Legion monolith and charge it fully, the extra charge time reveals more monsters and more Generals. Prioritize killing Generals (marked with an icon on the minimap after unfreezing) since they exclusively drop Enshrouding Crystals and larger Splinter stacks.
7. Sell Drops Strategically
List Enshrouding Crystals individually for maximum profit in week one before demand cools. Bulk-sell Timeless Splinters in stacks of 100 or as full Timeless Emblems. Save a stockpile of Emblems for personal Domain of Timeless Conflict runs where you can gamble your own Uniques via the new Crystals of Permutation.
5. PoE 3.29 Destructive Play Mercenary Strat (Early Game Atlas Rush & T0 Unique Jackpot)
The Destructive Play Mercenary strategy is the strongest early-game progression farm in 3.29 because it doubles as both an Atlas completion tool and a legitimate jackpot farm capable of dropping Headhunter, Mageblood, and Divine Orbs during the first 24 to 72 hours of the league. The core concept combines the Destructive Play notable cluster (which chains bonus map drops from boss kills) with the reworked Mercenary mechanic, which now spawns hostile Mercenaries in your maps that drop equipped items and currency on death. Infamous Mercenaries specifically have elevated chances to drop Divine Orbs, higher-tier currency, and Tier 0 Uniques like Headhunter and Mageblood, making this one of the few early-league strategies with genuine T0 jackpot potential without requiring significant Scarab investment. The strategy also naturally accelerates your Voidstone rush by giving you consistent boss map drops and higher-tier map sustain while you complete the Atlas quadrants clockwise (Eldritch → Originator → Decay → Ceremonial). This makes it ideal for the first 80 to 100 Atlas points, since every node you allocate directly supports both map progression AND jackpot income simultaneously. The main downside is that Mercenary spawns are RNG-gated, so runs are streaky, and Betrayal was nerfed heavily this league (Aisling's Omni craft removed), making Mercenary the clear replacement encounter for this Atlas archetype.
1. Understand the Voidstone Order
Progress your Atlas clockwise in this exact order to maximize early-game value:
Eldritch Voidstone (bottom left first) - grants access to Exarch and Eater Altars, which are the strongest early-league loot multipliers in the entire Atlas.
Originator Voidstone (top left) - unlocks Ashlit drops and Exceptional Support Gems.
Decay Voidstone (top right) - third priority since it's less impactful early but still required for full Atlas completion.
Ceremonial Voidstone (bottom right) - save for last since Maven is the hardest of the four Voidstone bosses and often requires a carry to complete efficiently.
2. Understand Map Completion Rules
Map completion rules in 3.29 are straightforward but critical to Atlas rushing:
White maps - kill the boss while the map is Magic (Transmute + Augment).
Yellow maps - kill the boss while the map is Rare (Alch).
Red maps - kill the boss while the map is Rare AND Corrupted (Alch + Vaal), OR use Chance/Mutation/Regal/Corrupt tricks for cheaper red map completion.
Focus on progressing ONE quadrant into T16 first, then use dropped T16 maps to complete the remaining three quadrants simultaneously. This is dramatically faster than trying to progress all four quadrants in parallel.
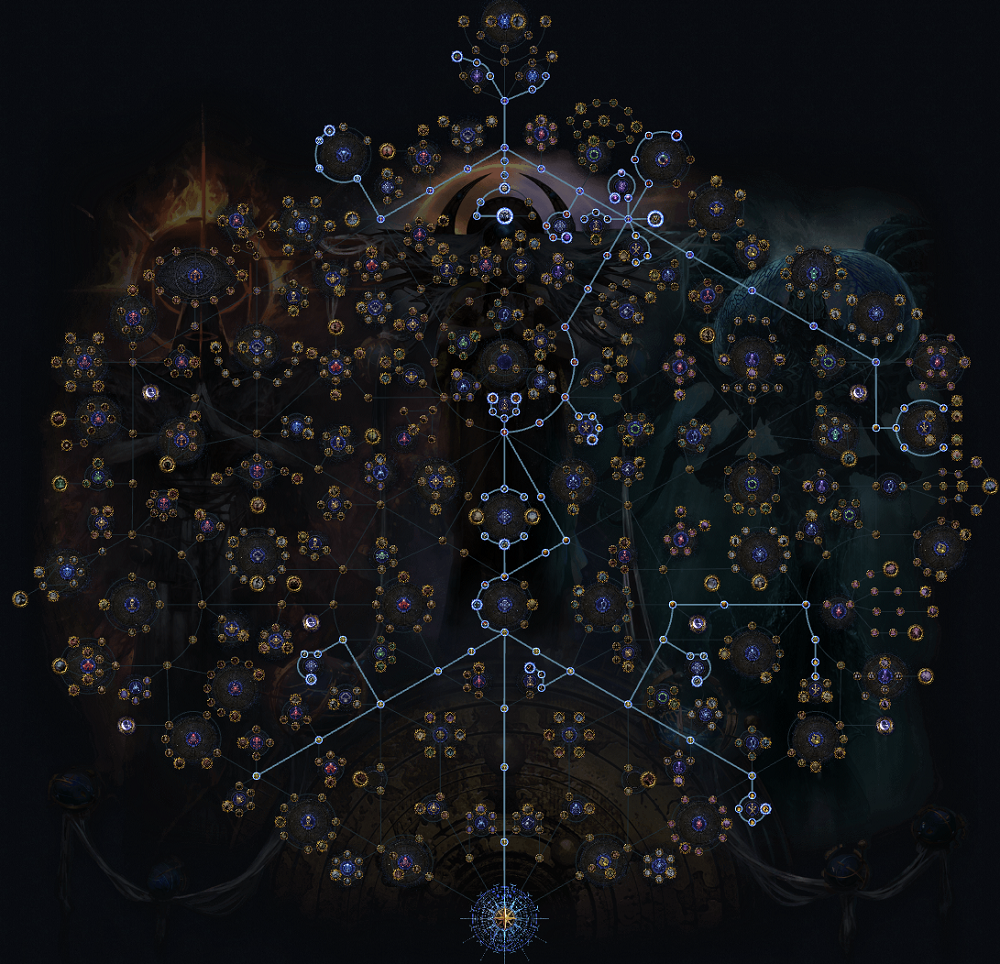
3. Build the Early-Game Base Atlas Tree
Rush the map sustain and map drop core before touching any farming nodes:
Take Shaping the Sky, Shaping the Wall, and Shaping the Mountains (all three) to guarantee map drops move up in tier.
Path straight down the middle to Unwavering Vision, which grants 20 extra Atlas passive points, this is your top priority allocation.
After Unwavering Vision, spend remaining early points on map sustain nodes (map drop chance, map quantity, map effect).
This base tree gets you into T16 as fast as possible so you can start farming your first Voidstone.
4. Use Kirac for Map Sustain Safety Net
Kirac is your emergency map sustain lifeline. Purchase any tier map you've already completed from him if your drops go dry. Use the 3-to-1 lower-tier trade-up recipe to convert three lower-tier maps into one higher-tier map, this is critical for pushing past T14/T15 walls when your drops go cold. Never let a dry streak stall your Atlas progression when Kirac trade-ups exist.
5. Rush to the Boss Every Map
Once your base Atlas tree is complete, run maps by rushing directly to the boss. Skip side loot, skip full clears, kill the boss, hope for a higher-tier map drop, exit, repeat. This is the fastest path to T16 access, which unlocks every other farming strategy in the game.
6. Allocate Destructive Play & Boss Map Nodes
Once you have baseline map sustain, take Destructive Play and the boss map drop cluster. Boss maps (Conqueror maps, Elder Guardian maps) sell well in the early league AND can be run on normal maps for progression (except for Shaper Guardians, which are locked to specific slots). This gives you dual value: sellable boss maps for income AND additional map sustain for Atlas rushing.
7. Skip Blight and Betrayal (League-Specific Warning)
Do NOT take Blight this league, monsters were nerfed and the mechanic feels significantly weaker in 3.29. Do NOT take Betrayal either, Aisling's Omni craft was removed and the only meaningful drops left are Medallions and Betrayal Master XP. Both mechanics are traps this league for early-game farming. Reallocate those points into Mercenary instead.
8. Allocate the Full Mercenary Cluster
This is where the strategy transitions from pure Atlas rush to jackpot farming. Take every Mercenary node in this order:
Mercenary spawn chance nodes (first priority, guarantees Mercenary encounters in maps).
Second Mercenary spawn cluster (further increases Mercenary spawn rate).
Infamous Mercenary nodes (4 points that dramatically increase the chance for Mercenaries to spawn as Infamous rank).
Infamous Mercenaries are the jackpot tier, they have significantly higher chances to drop Divine Orbs, higher-tier currency, and T0 Uniques (Headhunter, Mageblood, etc.). These 4 points are the single most important allocation in the entire strategy for jackpot potential.
9. Take Mercenary Item Nodes
Allocate the additional Mercenary nodes that increase the number and rarity of items Mercenaries carry. Mercenaries drop the items they have equipped when killed, so more items and higher item rarity directly increases your loot per kill. Also grab the Mercenary Unique item chance node, this is what enables T0 Unique drops from Infamous kills.
10. Grab Altered Prophecy for Free Divines
Allocate Altered Prophecy as soon as you're running T14+ maps. It grants a 4% chance for maps to drop a Divine Orb, which is essentially free money for a single Atlas point. This is one of the highest-value single-point allocations in the tree and should be picked up the moment you're eligible.
11. Execute the Farm
Enter T16 maps (any layout works, though open layouts help Mercenary spawn density). Rush to the boss for map progression and Voidstone completion. Kill every Mercenary you encounter, prioritizing Infamous Mercenaries (marked with a unique icon on the minimap). Loot dropped items and currency, then exit. Repeat until you've completed all four Voidstones.
12. Handle Mercenary Loot Correctly
Mercenaries drop equipped items on death, so check every item they drop, some pieces will be high-tier rares worth alching and selling, and Infamous drops occasionally roll into T0 Uniques. Do not auto-vendor Mercenary drops without checking them, this is where Headhunter and Mageblood drops actually happen. Bank all raw Chaos and Divines for major upgrades once you finish your Voidstone rush.
13. Transition Out of the Strat
Once all four Voidstones are complete (usually 48 to 72 hours into league start), transition out of pure Atlas rush and into a dedicated farming strategy like Altars & Go, Nightmare Map Farming, or the Ethereal Allflame Farm. Keep the Mercenary nodes allocated if you enjoy the jackpot potential, or respec them into your chosen farming strategy for maximum efficiency. Mercenary works well as a permanent Atlas fixture even alongside other strategies since the spawn rate is passive and doesn't compete with other mechanics.
6. PoE 3.29 Harvest Atlas Tree & Farming Strategy (Day One Currency Setup)
Harvest farming is one of the most reliable early-league currency strategies in Path of Exile 3.29 Curse of the Allflame, and it shines especially during the first 6–12 hours of the league when Lifeforce prices are still stabilizing. Unlike heavier mechanics that require strong gear or a fully-juiced Atlas, Harvest can be run in white 8-mod corrupted maps with minimal investment, making it accessible even when your build is still under-leveled and pushing through the campaign-to-maps transition. Lifeforce historically sells for around 100 per 1 Chaos (roughly 10K per 1 Divine) once the economy settles, and since all three Lifeforce colors trade at similar rates at league start, you don't need to worry about targeting a specific color. This makes Harvest an ideal "quick-cash" strategy to bankroll your first 50–200 Chaos worth of build upgrades before pivoting into red maps and full Atlas completion. The strategy is safe, fast, and scales well from tier 7 all the way up to tier 16 as your gear improves.
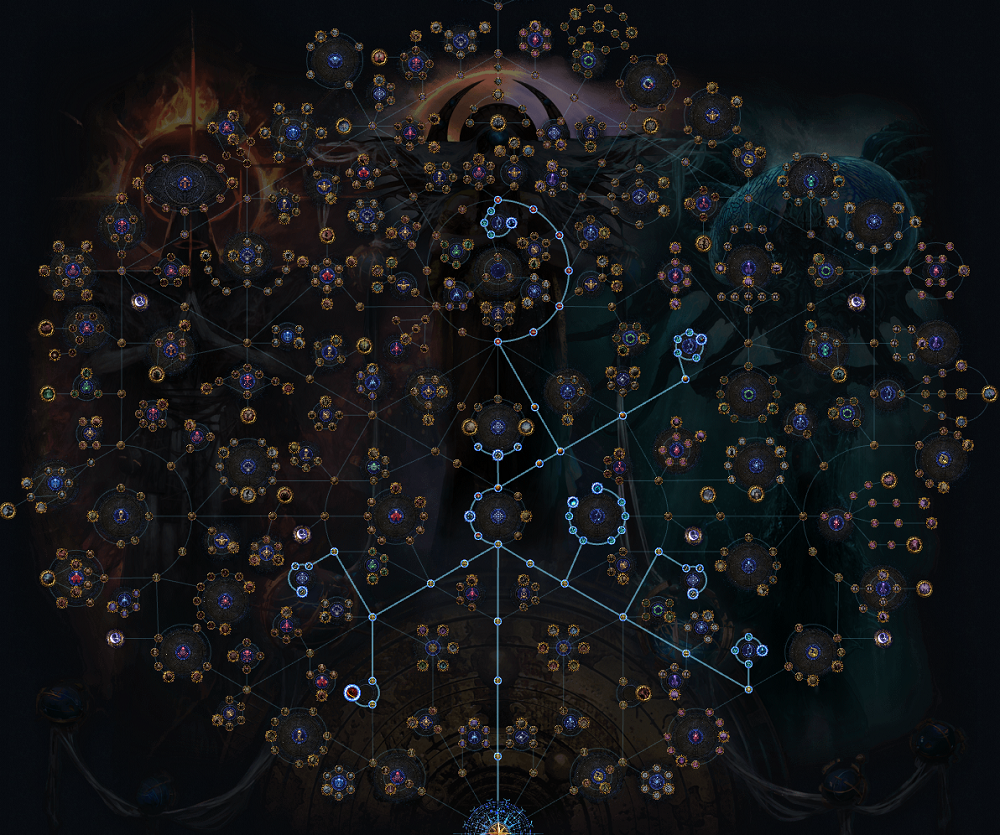
1. Early Atlas Tree (First 30–35 Points)
For the initial "make 50–200c to upgrade your build" phase, keep your tree lean and focused:
Shaping the Skies and Shaping the Mountains - more magic and rare monsters in maps, which directly translates to more Harvest monsters.
All Harvest nodes - take the full Harvest cluster for increased plot size, more Tier 3 seeds, and more Lifeforce per plant.
Block unwanted mechanics - Breach (nerfed in 3.29), Legion (until you can Enshroud), Expedition, Abyss, and any other mechanic you don't want cluttering your maps. Blocking these massively boosts your Harvest spawn rate.
Skip Crop Rotation unless you already know how to play it properly. Crop Rotation targets more Vivid and Primal Lifeforce, but if you don't understand the mechanic, plain Harvest earns roughly the same Lifeforce per hour with far less headache.
2. Map Setup
Your ideal map is:
White (unrolled base), then 8-mod corrupted via a Vaal Orb.
110%+ Item Quantity and 40%+ Pack Size (double-corrupt if needed, or buy them from bulk sellers).
Any low-tier map works, tier 7 gives similar Lifeforce yields to tier 16 for Harvest purposes, so use whatever is cheapest.
If you can't buy 8-mod corrupted maps early, farm them yourself using the Cartography of Corruption and Cartography of Escalation scarabs to force corruptions on the maps you're already running.
3. Scarab and Fragment Slots
In the map device, load:
1× Harvest Scarab of Doubling (mandatory, this is the core of the strategy).
Sacrifice Fragments (Dawn/Dusk/Noon/Midnight) in the remaining slots, if you have the Multiplying Modifiers notable on your Atlas tree (2% increased scarab effect per fragment). If sacrifices are too expensive or unavailable, slot random cheap scarabs, or leave the slots empty if it isn't worth the Chaos investment.
4. Flask and Keystone Setup for Speed
Since Harvest is a "run in, harvest, run out" strategy, movement speed is everything:
Use two Quicksilver flasks with Increased Movement Speed and Increased Effect rolls, plus the Increased Effect enchant. Alternate between them for near-permanent uptime.
Take the Dance of Destruction keystone on your Atlas tree, monsters have less life, which lets your under-geared character clear Harvest plants and mobs faster.
5. Running the Map
Rush through the map to find the Harvest encounter (Sister of Garukhan / Oshabi).
Trigger the Harvest.
Prioritize the plots with the most Tier 3 seeds, do not worry about the color of Lifeforce.
Kill everything, collect Lifeforce, and exit.
Each map takes roughly 1–1.5 minutes with good clear speed and gives you 1,000–3,000+ Lifeforce per map (with occasional lucky runs pushing 4,500+).
At ~100 Lifeforce per Chaos, that's 10–30 Chaos per map, minus 2–3c for the scarab, netting roughly 7–25 Chaos of profit per map in just a couple of minutes. This is more than enough to fund your first serious upgrades and get your build ready for red maps.
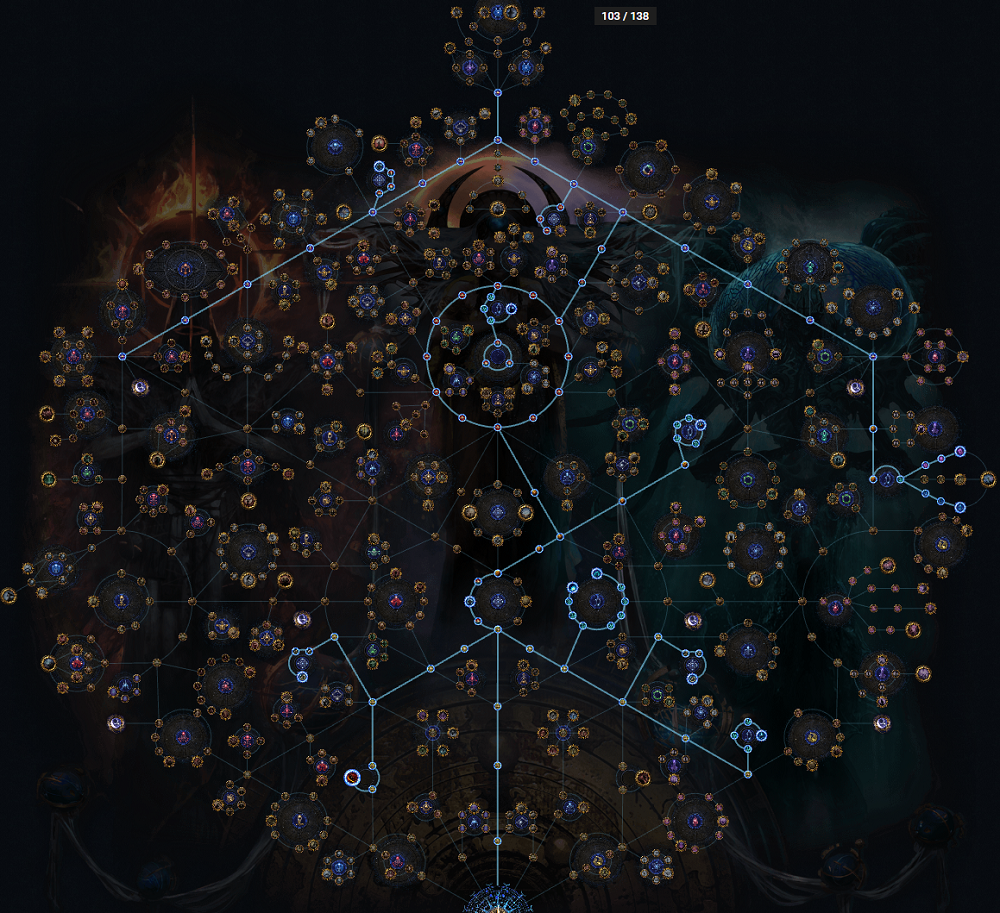
6. Transitioning to the Full Harvest Tree (Post-Atlas Completion)
Once you've completed your Atlas (around 100 Atlas passive points, not necessarily all 4 Voidstones yet), you can pivot to the full Harvest specialization tree. Keep the same setup, 8-mod corrupted white maps + Harvest Scarab of Doubling, but now with the full Atlas tree investment.
Expected results with the full tree:
60,000–100,000 Lifeforce per hour depending on clear speed and luck.
Roughly 600–1,000 Chaos per hour at league-start prices.
Individual maps can range from 1K Lifeforce on unlucky runs up to 6K+ Lifeforce on lucky plot spawns.
If you're comfortable with Crop Rotation at this stage, allocate it for higher targeted yields of Vivid and Primal Lifeforce (which sometimes command a small price premium). If Crop Rotation confuses you, stick to plain Harvest, the Lifeforce-per-hour is nearly identical, and the mental overhead is much lower.
7. PoE 3.29 Delve Atlas Tree & Farming Strategy (Reliable League-Start Currency Engine)
Delve remains one of the most dependable league-start farming strategies in Path of Exile 3.29 Curse of the Allflame, and it continues to be a go-to opener league after league for good reason. The mechanic pairs perfectly with the campaign-to-maps transition because you can start running Nikko encounters extremely early, and after last league's sulfite buff, sustaining Delve runs has become significantly easier even without dedicated sulfite scarabs (which no longer exist as a modifier). Fossil crafting is still one of the strongest deterministic currency loops in the game, unique node discoveries in the Azurite Mine produce build-defining items that maintain permanent demand, and the strategy synergizes cleanly with boss farming and Atlas passive tree efficiency thanks to shared clusters like Shaping the Mountains. On top of that, Delve doesn't compete directly with any of the 3.29 reworks: Abyss, Legion, and Breach changes don't cannibalize Delve's rewards, so it slots neatly alongside whichever secondary mechanic you decide to farm. It's also flexible: once your core Delve tree is set, you have a huge number of remaining Atlas points to steer toward Abyss, Legion, Breach, Shrine juicing, or boss farming based on your build and preference.
1. Rush the Frenetic Mining Nodes First
Head straight up into the Delve cluster and pick up the Frenetic Mining nodes as your very first passives. Do not block any league mechanics at this stage, the priority is getting into the Azurite Mine as quickly as possible, because that's where the real currency generation happens. Getting Frenzy Mining early massively increases sulfite gain and Delve depth potential.
2. Path Through Shaping the Mountains
Take Shaping the Mountains next. This unlocks earlier and more prominent map drops, which directly improves both your Atlas progression and your sulfite income (higher-tier maps grant more sulfite per completion).
3. Grab Every Delve Chance / Nikko Encounter Node
Allocate all the Delve Chance in Maps nodes so Nikko appears in as many of your maps as possible. This is the backbone of sustaining sulfite without needing to invest in dedicated sulfite scarabs.
4. Optionally Take Price of Progress
Path up through Price of Progress if you want additional Delve efficiency. This is a strong optional detour before continuing to your outer Delve cluster.
5. Take Mining Byproducts and the Core Delve Cluster
Move into Mining Byproducts and pick up all the surrounding Delve passives. Do not allocate Meticulous Appraiser or Overloaded Circuit at this stage, those nodes interact with other Atlas areas and can create conflicts with your farming plan.
6. Pick Up Rare Map Modifier and Scarab Nodes on the Way
While pathing toward the outer Delve cluster, grab the rare map modifier passives and the small Scarab wheel, the whole radial is useful because it grants increased Scarab drops, which pairs well with any Delve-adjacent farming.
7. Allocate Sulfite Infusion in the Final Delve Cluster
Push out to the final Delve cluster (its location has shifted slightly in 3.29) and take Sulfite Infusion. This grants extra sulfite and your last chance-to-drop bonuses, essentially locking in sulfite sustain permanently.
8. Pick Your Secondary Mechanic
With your Delve core complete, you have significant flexibility. Choose one of the following directions based on your build and league goals:
Legion or Breach - Excellent for builds with strong AoE like Flamewood Totems; Legion produces Enshrouding Crystals (huge demand in week one) and Breach spits out consistent currency.
Mercenaries of Trarthus - The new war hires can be profitable depending on your build compatibility.
Harvest - Steady Lifeforce income that stacks with your Delve currency stream.
Shrines - Solid quality-of-life buff for clear speed and survivability during early mapping.
Abyss - Sits on the right side of the tree; peel off any conflicting modifiers and dive in for jewel and Stygian Vise farming.
9. Take Remnants of the Past and Conquerors
Grab Remnants of the Past to enable Shaper and Elder boss content, then path into the Conqueror cluster. Boss farming pairs extremely well with Delve because you generate boss fragments passively while running maps, and Conquerors produce reliable currency.
10. Add Eldritch Altar and Atlas Passive Points
Once your build can handle it, take the Eldritch Altar nodes so you can farm altars alongside Delve. Altars are strong early-league juice and don't interfere with sulfite generation.
11. Take Cortex, Nebulis, and Maven Nodes
Allocate points into the Cortex/Nebulis farming cluster (Nebulis prices spike at league start) and the Maven boss rush cluster. Maven boss rush is one of the most consistent ways to level your Atlas Memory and generate additional currency once you're running red maps confidently.
12. Multiplier Modifier and Extra Scarab Nodes
Round out the tree with multiplier modifier passives and any remaining Scarab drop nodes. These small bonuses compound significantly across hundreds of maps.
13. Fill the Final Points Flexibly
You'll be at roughly 99 points at this stage, leaving you a handful of flexible passives for the last touches. Options include:
Additional quantity and rarity nodes.
More Scarab drops.
Extra encounter nodes for your chosen secondary mechanic.
Shrine effect or Harvest quant nodes if you want a smoother map experience.

14. Scarab Setup for Delve Maps
Delve Scarab of Bounty - Increases sulfite and Nikko rewards.
Delve Scarab of Portals (if available) - Adds an additional Delve encounter or Fossil-rewarding node access.
Fill remaining slots with generic scarabs (Cartography, Divination, or your secondary mechanic's scarab) depending on what else you're farming.
15. Execution Loop
Roll and run a Red-tier map with decent Pack Size and Quantity.
Locate the Nikko encounter and collect sulfite.
Complete the map, kill the boss for map sustain, and clear any additional encounters from your secondary mechanic.
Return to town, spend sulfite in the Azurite Mine on Fossil nodes, unique nodes (Aul's Uprising, Vaal Outpost, etc.), and Resonator nodes.
Sell Fossils and Resonators in bulk, or craft targeted items for higher-margin sales.
16. Selling Strategy
Fossils - Bulk-sell in stacks of 20 or 100 depending on rarity. Aberrant, Pristine, Prismatic, and Faceted Fossils typically hold the highest prices.
Resonators - Primitive and Potent Alchemical Resonators bulk-sell well; save Powerful Chaotic Resonators for personal crafting.
Unique Node Drops - Aul's Uprising, headhunter-tier drops, and other node-locked uniques can be listed individually for maximum profit.
The core advantage of this Delve setup is flexibility. If Fossil prices dip, you can pivot into pure sulfite-to-node farming for unique item drops. If Delve competition heats up mid-league, you already have the boss and Conqueror clusters ready to switch focus. And because sulfite sustain is now trivial after 3.28's buffs, you'll rarely find yourself gated on Delve depth — just push harder maps for more sulfite per run and keep the mine running.
8. PoE 3.29 Ritual Stacked Deck Atlas & Farming Strat (Divination Scarab of the Cloister Juicer)
The Ritual Stacked Deck farm is one of the most consistent and beginner-friendly juicer strategies in 3.29, generating 40 to 60+ Stacked Decks per map alongside raw Divines, chase Uniques, Omens, and Nightmare Maps from 8-mod corrupted juice runs. The core concept is stacking five Divination Scarabs of the Cloister on every map, which forces Ritual encounters to spawn special monsters that drop massive quantities of Stacked Decks on death. Because Divination Scarabs of the Cloister trade for significantly less than the raw Stacked Deck value they generate (as long as they stay under ~12 Chaos each), the strategy is profitable on Scarab investment ALONE before you even factor in Ritual window rewards, Altar drops, chase Uniques from 8-mod juice, and Nightmare Map drops. The strategy also benefits massively from Ritual's slingshot mechanic, where monsters killed at one Ritual altar get carried into subsequent altars, meaning your final Ritual of the map is always stacked with the combined density of all previous Rituals. This makes it one of the few farming strategies where careful play order (Rituals from best to worst) directly multiplies your profit without requiring expensive investment. The main downside is that it requires all four Voidstones AND a fifth Scarab slot unlocked via T17 Nightmare Map boss kill, so it's not a true league-start strategy, it's a transition strategy for days 3 to 7 once you have a functional mapper.
1. Complete the Prerequisites
Before this strategy is even accessible, you need to complete two hard requirements that will take 24 to 72 hours of prior progression:
All four Voidstones completed (follow the clockwise Eldritch → Originator → Decay → Ceremonial order for fastest completion).
Fifth Scarab slot unlocked by killing a T17 Nightmare Map boss. This is mandatory, four Scarabs of the Cloister is significantly weaker than five, so do not attempt this strategy without the fifth slot.
Your league starter needs to be capable of killing a T17 boss to unlock this strategy. Ignite Penance Brand, Cold DoT Elementalist, and other strong boss-killing mappers are ideal choices for reaching this benchmark quickly.
2. Understand the Profit Breakdown
Set your profit expectations correctly before starting so you know what to price-check and what to trash:
~60 Stacked Decks per map as the primary income source, this alone breaks even on Scarab cost if Cloister Scarabs are under 12c each.
Raw Divines dropping on the ground and from the Ritual window (highly variable but consistent over volume).
Chase Uniques from 8-mod corrupted juice (Archdemon Crown, various headhunter-tier items, build-enabling pieces).
Omens from the Ritual window (some are highly valuable, always price-check).
Nightmare Maps as consistent side drops (good sustained income for T17 farming later).
Rare Specters and Minion Uniques (some sell for 1+ Divine on league start, always price-check before vendoring).
The market on Uniques is hottest during days 3 to 7 of league start, so this strategy has a limited peak profit window, run it hard while prices are inflated.
3. Buy Your Divination Scarabs of the Cloister
This is the single most important cost input. Set up a live trade search for Divination Scarabs of the Cloister and buy them in bulk when they're under 12 Chaos each. The entire strategy hinges on Scarab cost staying below ~12c, so if the market inflates past that point, either pause the strategy or verify your average Stacked Deck sell price still justifies the cost. During early league, Cloister Scarabs typically sit between 5 to 10 Chaos, making this strategy highly profitable. As more players catch on and demand rises, prices climb, so front-load your Scarab purchases early.
4. Set Up Your Map Trade Filter
Do NOT farm your own 8-mod juice maps, buying them is dramatically faster and cheaper on league start. Set up a live search with these parameters:
Tier 16 maps only.
44%+ increased pack size (higher is better, but 44% is the minimum acceptable).
8 modifiers (fully corrupted with Vaal Orb).
NOT count filter for any mods your build hates (typical avoid list: no leech, no regen, cannot leech, ele reflect, phys reflect, extra damage from crits).
These maps cost 2 to 3 Chaos each on league start, which is trivial compared to the profit per map. Buy 30 to 50 at a time to minimize downtime between runs.
5. Pick the Right Map Layout
Layout matters significantly for Ritual farming because you're doing multiple Ritual altars per map and Ritual density scales with monster density in the surrounding area. City Square is the top pick due to its small, dense, open layout that makes both mob clearing and Ritual altar navigation extremely fast. Other acceptable layouts include Cemetery, Dunes, and Atoll. Avoid maze-like layouts (Coves, Necropolis, Villa) since Ritual altars can spawn in awkward positions that waste map time.
6. Build the Ritual Stacked Deck Atlas Tree
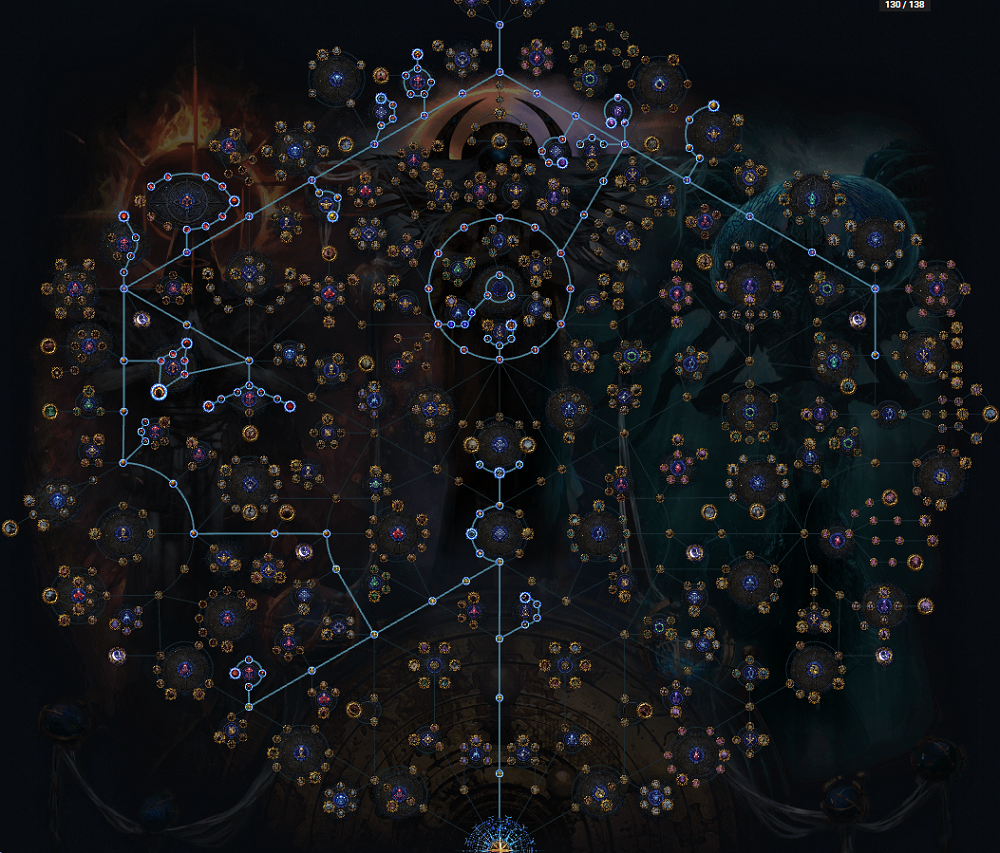 Allocate points in this priority order:
Grab every "Increased Effect of Explicit Modifiers on Maps" node, this multiplies your 8-mod juice map value significantly.
Grab the Map Quantity wheels, more items dropping means more raw currency and chase Uniques.
Take every Ritual node available, including reroll favors, tribute gain, defer costs reduced, and Ritual altar spawn chance. Ritual is your entire profit engine, so no Ritual node is optional.
Choose either Eater of Worlds OR Searing Exarch Altars (not both), and take the "Currency Item Duplicated" Altar priority node. This is the most important Altar choice, because Stacked Decks count as basic currency for Altar duplication, the Currency Duplication Altar will duplicate the massive stack of Decks you're dropping, effectively doubling a huge portion of your income for free.
Timestamp your Atlas tree completion for reference and don't respec until you're ready to switch strategies entirely, this tree is tightly optimized for Ritual and doesn't cross over well with other farms.
7. Slot All Five Scarabs
Every single map, slot five Divination Scarabs of the Cloister. Do not slot four, do not mix in other Scarabs, do not experiment with hybrid setups on this strategy, the entire mechanic is built around five Cloister Scarabs guaranteeing maximum Stacked Deck monsters at every Ritual altar. Any deviation dilutes your Stacked Deck yield and breaks the profit math.
8. Execute the Map Correctly
Enter the map and clear naturally toward each Ritual altar. As you kill monsters INSIDE each Ritual circle, watch how many Stacked Decks drop from the pre-Ritual kills. This is critical intelligence, the number of Stacked Decks dropping from a Ritual's mob pack directly signals how many special Div-Card-Dropping monsters that Ritual contains. Mentally rank each Ritual altar from best (most Stacked Decks) to worst (fewest) as you clear the map.
9. Understand and Exploit the Slingshot Mechanic
Ritual has a built-in "slingshot" mechanic, when you defer a Ritual altar, the monsters from that Ritual get thrown forward into the NEXT Ritual altar you run. This means:
If you run Rituals in order from worst to best, the best Ritual accumulates all the previous monsters, becoming absolutely stacked with Stacked Deck droppers.
Even a Ritual that started with zero special monsters can drop 20+ Stacked Decks if you slingshot three other Rituals into it first.
Actually run Rituals from worst to best (not best to worst) so that the final Ritual has the compounded monster pool from all previous slingshots. Alternatively, you can run them from best to worst if you want guaranteed early loot with less risk of dying to a slingshot-loaded final Ritual, but worst-to-best maximizes total profit per map.
10. Balance Nitpicking Against Speed
The slingshot optimization matters, but do NOT over-optimize at the cost of run speed. More map repetitions = more money, always. If you're spending 3 extra minutes per map memorizing Ritual quality, you'd have made more Chaos just running one extra map at baseline efficiency. The sweet spot is: glance at Stacked Deck drops during clear, defer the obvious high-value Rituals for last, and don't sweat perfect execution. Speed compounds harder than optimization at this scale.
11. Loot and Price-Check the Right Items
Loot filter should be set to strict league-start settings, but manually verify these categories every map:
Every Unique dropped (chase Uniques, minion Uniques, Specter Uniques often sell for 1+ Divine early league).
Every Omen from the Ritual window (some are worth 10+ Divines, some are trash, always check).
Any 6-linked or high-tier rare (Archdemon Crown and similar build-enablers spike hard in early league).
All Stacked Decks, Divines, and raw currency (obvious, but verify your loot filter isn't hiding smaller currency stacks).
Do not vendor or trash Uniques without price-checking, this is where the "surprise Divine" drops happen that push this strategy from break-even into massive profit.
12. Track Your Profit in a Spreadsheet
For serious execution, tabulate your drops in an Excel or Google Sheets spreadsheet over 10 to 20 maps to see exactly where your profit is coming from. This lets you catch market shifts (e.g., if Archdemon Crown drops from 40c to 20c, or if Cloister Scarabs inflate past 12c), and it helps you decide when to pivot out of the strategy. Tracking is optional but highly recommended for anyone treating PoE as an economic optimization problem.
13. Know When to Exit the Strategy
This is a days 3 to 10 strategy, not a permanent farm. Exit conditions include:
Divination Scarabs of the Cloister exceed ~12 Chaos each consistently (profit margin collapses).
Unique prices crash as the market saturates (typically day 7 to 14).
You've accumulated enough currency to move into premium juicer strategies (T17 farming, Wandering Path setups, or bulk Scarab strategies).
When you exit, respec your Atlas into your next farming target and sell off any remaining Cloister Scarabs before their price drops further.
9. PoE 3.29 Shrine Stacking Scarab Atlas & Farm Strategy (Templar Astrolabe + Domination Reliable Profit Loop)
The Shrine Stacking Scarab farm is one of the most reliable dedicated scarab-farming strategies in 3.29 Curse of the Allflame, built specifically to solve the problem of Operative's Strongbox from Charts being too RNG-dependent to serve as a stable scarab income source. Instead of chasing unreliable Chart drops, this strategy leverages a Templar Astrolabe to force a "final map boss drops 2 or 3 scarabs" modifier onto a map, then multiplies that single modifier into 14 boss kills per map by using Domination Scarabs to spawn 14 shrines with the Terror upgrade turning every shrine into a bonus map boss. The result is a dense, repeatable scarab farm that also generates raw Divines from Memory Vaults and (with enough Voidstones) Nightmare maps as free side profit. This is not a zero-cost strategy, it has upfront investment in Astrolabes and Domination Scarabs, but the setup itself is profitable, meaning your Astrolabe farming phase covers its own costs before you even hit the scaled shrine-stacking runs.
1. Prerequisites and Cost Awareness
Verify you can access T16 mapping and check current Scarab prices before committing:
At minimum, one Voidstone unlocked (bottom-left region for Searing Exarch or Eater of Worlds) so you can run T16 maps.
More Voidstones is better, additional Voidstones significantly increase Nightmare Map drop chance, which becomes free profit stacked on top of the core scarab income.
Current cost reference (based on live testing): Domination Scarab around 1.7 Chaos, Domination Scarab of Terrors around 63 Chaos, Templar Astrolabe around 63 Chaos. Always price-check before starting since these numbers shift daily.
2. Phase One: Astrolabe Boss Rushing for the Scarab Modifier
Before you can run the main shrine-stacking farm, you need a map with the correct modifier applied. This is the setup phase, and it's profitable on its own:
Apply Templar Astrolabe on City Square. City Square is the top pick because it has the highest chance to roll into good, open layouts under the Astrolabe's map-swap effect.
Ensure Synthesised Stability is active so the Astrolabe layout stays consistent.
Boss rush City Square with no Scarabs during this phase. You're specifically farming for the modifier, not maximizing loot per map, so keep Scarab costs at zero.
Kill the boss, then check every map dropped on the ground and in the Memory Vault.
The target modifier is: "Final map boss drops 2 or 3 additional Scarabs." From testing, this modifier appears on roughly 1 in every 2 to 3 Astrolabe runs, which sounds slow but is dramatically better than it seems once the multiplication kicks in.
Raw Divines from Memory Vaults offset your Astrolabe cost during this phase, which is why the setup pays for itself even before you start the main farm.
3. Phase Two: Shrine Stacking on the Modifier Map
Once you have a map with the "final map boss drops 2 or 3 additional Scarabs" modifier, the strategy shifts to maximum shrine density. The scarab modifier stacks per boss, and every shrine boss counts as a "final map boss" for the purpose of this modifier, which is where the profit explodes:
Slot 4 Domination Scarabs to add 12 additional shrines to the map. Combined with two shrines from the Atlas tree, this brings your total to 14 shrines per map.
Include Domination Scarab of Terrors as one of the four Scarab slots. Terror shrines spawn a map boss at each shrine location, and each of these bosses counts as a "final map boss" for the scarab-drop modifier.
Every one of the 14 shrine bosses drops 2 to 3 additional Scarabs, which multiplies your Scarab-per-map yield by an order of magnitude compared to a normal boss-only setup.

4. Map Difficulty and Altar Choice
The strategy works on lower-difficulty maps because shrine density is doing all the heavy lifting:
Blue (Magic) maps work fine if your gear isn't fully built out. The strategy is powerful enough that you don't need to layer 8-mod juice on top, so keep it accessible.
Choose Searing Exarch Altars for stable income. Exarch Altars roll consistent currency and quantity modifiers that scale steadily with your loot output.
Choose Eater of Worlds Altars if you want jackpot potential. Eater Altars have a small chance to roll Divine Altars, which are massive spikes in single-map profit but come with more variance.
5. Execution Order Inside the Map
The kill order matters significantly for this farm, do NOT default to killing bosses on sight:
Enter the map and clear normally, but do not kill any of the shrine bosses immediately.
Find every Altar first by sweeping the map layout. Pause the game to read Altar modifiers if you need to (this is legitimate strategy, not cheese).
Activate the Altars that duplicate currency, drop Scarabs, or boost quantity.
Only after all Altars are active, return to the shrine bosses and kill them. Their scarab drops will now be multiplied by any duplication effects you activated.
This ordering can effectively double your Scarab-per-map output on lucky Altar rolls.
6. Why This Beats Chart-Based Scarab Farming
Chart farming for Operative's Strongboxes is the alternative approach for scarab acquisition, but it fails on two fronts compared to this method:
Reliability: Operative's Strongbox drops are heavily RNG-gated, and dry streaks can span dozens of Charts with no meaningful Scarab income.
Density: Even a successful Operative's Strongbox drops fewer Scarabs than a single fully-executed shrine-stacked map with the boss modifier active.
The Astrolabe approach has a deterministic setup phase (with a known modifier hit rate) followed by a repeatable high-density farm, which converts unpredictable RNG into a stable, plannable Scarab income stream.
7. Selling Strategy
Because this is a pure Scarab-farming strategy, your inventory fills specifically with Scarabs plus side loot:
Bulk-sell common Scarabs in stacks of 20 or 100 for fast turnover in the early league Scarab market.
List rare or high-value Scarabs individually (Legion Scarab of Command, Cartography Scarab of Duplication, Divination Scarab of the Cloister, etc.) since these move quickly at premium prices.
Nightmare Maps drop as side income on 3+ Voidstone characters, list these at 35 to 40 Chaos each or bulk-sell in stacks of 10.
Track your Astrolabe cost against Scarab revenue each session to confirm the strategy is still profitable. If Astrolabe prices climb above ~100 Chaos while Scarab prices remain flat, pause and reassess.
10. PoE 3.29 Strongbox Chart Atals & Farm Strategy (Fast Maps, Cheap Scarabs & Chart Volume Engine)
The Strongbox Chart farm is the top Trade League strategy in 3.29 Curse of the Allflame for players who want to fly through maps as fast as possible while collecting massive volumes of Charts, currency, Scarabs, Divination Cards, and random league mechanic drops all at once. After GGG's mid-league buff to the Curse of the Allflame mechanic, Charts became one of the highest-value drops in the game, and the fastest, cheapest way to accumulate them is by running short, dense, Strongbox-focused Alch-and-Go maps that don't waste time on slow mechanics like Harvest, Legion, or Ritual. Strongboxes remain a beloved league-after-league farm because they scale cleanly with Scarab investment, spawn dense monster packs, and generate consistent currency without requiring specialized gear, expensive 8-mod juice, or a high character power level. Even better, Strongbox Scarab prices are exceptionally cheap right now (most under 4 Chaos, some under 1 Chaos) because the removal of Mirage duplication temporarily scared off the market, meaning the cost-to-profit ratio has never been more favorable. The strategy also produces significant side income from Eldritch Altar rewards, Astrolabe drops, and random league mechanic procs (personal testing produced a Replica Alberon's Warpath worth ~40 Divines from a random Heist event), while the natural map turnover from Strongbox loot keeps your Atlas stocked without needing dedicated sustain nodes. Execution is dead simple: boss rush, click every Strongbox and Eldritch Altar along the way, grab Charts, and exit, this is a pure volume strategy where maps-per-hour matters far more than per-map optimization.
1. Scarab Setup (Five-Slot Loadout)
Load these five Scarabs in your map device every single run:
2× Ambush Scarab (base) – Guarantees additional Strongboxes per map. You can push to 3× base Ambush Scarabs, but Potency and Discernment give better returns per slot at current market prices.
1× Ambush Scarab of Potency – Increases the effect of explicit modifiers on Strongboxes. This scales rolls like "contains 4 extra Ambush Scarabs" up to 7, or "100% increased quantity" up to 175%. Currently under 1 Chaos each.
1× Ambush Scarab of Hidden Compartments – Grants a 15% chance for Strongboxes to be openable multiple additional times. Combined with Atlas tree bonuses, this creates recursive multipliers where a single Strongbox can pop open three, four, or more extra times, which is why this beats slotting a fourth basic Ambush Scarab.
1× Ambush Scarab of Discernment – Dramatically increases the chance of Arcanist's, Diviner's, and Cartographer's Strongboxes appearing. Testing shows this is the single most impactful Scarab in the setup, without it, high-value Strongboxes barely spawn at all. Currently under 4 Chaos each.
Optional: Ambush Scarab of Containment – Guarantees more valuable Strongbox types on top of Discernment. Currently ~0.5 Divine each, so only slot this once you're comfortable with the strategy's baseline profit.
Even if Ambush Scarab prices double or triple, this loadout remains profitable. Only pivot away if Ambush base Scarabs 10x from current prices.
2. Map Choice
Mesa is the top pick – Fast boss rush (run directly to the boss, kill, then clear back through the map), clean open layout, and easy Strongbox visibility. The only downside is poor Divination Card pool, so it's incompatible with Altered Prophecy Scrying setups.
If pairing with Altered Prophecy – Use Maps of Exile to find a map with both a decent layout and good Divination Cards (Cemetery, Dunes, City Square, or Atoll). Accept that most good-div-card maps have slower layouts than Mesa, so this is a conscious trade-off.
Do NOT run below T16 with the full five-Scarab investment. Below T16, drop Discernment and run a lighter setup focused on progression until you unlock T16 access.
Rolling is Alch-and-Go – No need to buy 8-mod corrupted maps. This strategy is about speed and Scarab-driven density, not juice.
3. Optional: Templar Astrolabe Layer
Astrolabes are optional and skippable. The strategy naturally produces a wide variety of Astrolabes through Eldritch Altars and map completion drops, so applying Astrolabes is pure trade-off cost.
If you apply an Astrolabe, that map cannot drop additional Astrolabes, so you're paying for end-vault rewards on that specific run.
If you commit to Astrolabes, you MUST allocate Speaker of the Dead and Unrelenting Torment on the Atlas tree since Templar Astrolabe can roll possessed boss modifiers that will one-shot you without those nodes.
For same-map repeated farming with Templar Astrolabe, additionally allocate Synthesised Stability (4 points deep into an otherwise weak cluster). Only worth it if you're committed to farming specific-map Divination Cards via Scrying.
4. Atlas Passive Tree (138-Point Full Build)
Allocate points in this priority order:
Strongbox Cluster (Mandatory, All Nodes):
Guaranteed additional Strongbox
Increased chance for extra monsters from Strongboxes
Strongboxes are Rare and Corrupted
Chance for Strongboxes to be re-openable
Double currency drops from Strongboxes
Double Divination Card drops from Strongboxes
Concealed Logistics – Often skipped in past leagues, but mandatory this league since Charts eat through your map pool and Concealed Logistics generates map volume even at lower quality.
Scarab Cluster (Mandatory):
Full Scarab drop wheel
All small Scarab drop nodes
Trapping Carapace – Specifically boosts Ambush Scarab drops
Multiplying Modifiers – Mandatory since you're running 5 Scarabs every map
Remarkable Relics and surrounding Scarab passives
Map Modifier & Quantity Cluster:
Standard top hat and antenna map effect nodes
Increased Quantity wheel
Memory Influence nodes for T16.5 Uber map access
Shrine Cluster (Recommended):
Full Shrine cluster for clear speed, survivability, and general QoL
Eater of Worlds Altar Cluster:
Full Eater of Worlds pack size cluster for compounding monster density
League Mechanic Blockers:
Block Delirium, Blight, Ritual, and Expedition Scarabs (low market value)
Leave Abyss unblocked (Scarab prices are spiking on anticipated buffs)
Leave Harvest, Legion, Torment, Ultimatum, and Kalguuran unblocked (all valuable)
Situational Nodes:
Altered Prophecy – Only if running a good Divination Card map. Since Scrying Orbs scry the map you're currently on, taking this on Mesa is wasted.
Speaker of the Dead + Unrelenting Torment – Take if using Templar Astrolabe (mandatory for survival), otherwise optional for the fun possession mechanic and free density.
Shaping the World (1 point) – Small free extra map chance from final boss kills.
Invasive Adversaries – Optional filler for extra monster density. Monsters are annoying but drop decent loot.

5. Reduced-Point Configuration (Under 138 Points)
If you're still building up Atlas points, the strategy works at roughly 90 to 100 points with this stripped-down version:
Full Strongbox cluster (mandatory)
Full Scarab cluster (mandatory)
Full Shrine cluster (recommended)
Skip Eater of Worlds pack size nodes
Skip Speaker of the Dead / Unrelenting Torment
Skip Memory Influence nodes
Add these clusters back in as you accumulate more Atlas passives.
6. Map Execution
Each map runs on a fixed, repeatable loop:
Enter the map and boss rush immediately – Run directly to the map boss, killing only what's in your path.
Kill the boss and collect Eldritch Altar rewards from the boss encounter.
Clear back through the map – Hit every Strongbox and Eldritch Altar you spot along the way.
Grab Charts, currency, Scarabs, and Divination Cards as they drop.
Exit the map and load the next one – Do not full-clear unless the Strongbox density specifically demands it. Maps-per-hour is the entire point of this strategy.
7. Selling Strategy
Charts – Primary income source. Bulk-sell or list individually based on rarity and current market demand.
Astrolabes – Bulk-sell in stacks or list rarer variants individually for maximum profit.
Strongbox Currency Drops – Bulk-sell Chromatic Orbs (now much rarer in 3.29, prices are elevated), Alteration/Regal/Scouring Orbs, and Divination Cards in stacks of 20 to 100.
Scarabs – Bulk-sell cheap Scarabs, list high-value Scarabs (Legion Scarab of Command, Cartography Scarab of Duplication, etc.) individually.
Random Unique Drops – Always price-check Uniques from possessed monster procs, Heist event drops, and league mechanic procs. Occasional T0 drops (like Replica Alberon's Warpath) can single-handedly justify hours of farming.
11. PoE 3.29 Essence Scarab of Calcification Atlas & Farm Strategy (Reliable Post-Rework Currency Engine)
The Essence farm is one of the most reliable trade league strategies to fall back on in 3.29 after the underwhelming league mechanic reworks, and it shines particularly well starting about one week into the league once crafters are hungry for essences to spam onto Fizz weapons, chest pieces, and fractured armor bases. The core concept is simple but powerful: use the Essence Scarab of Calcification to convert every naturally-spawning rare monster in your map into an essence-imprisoned mob, then stack the Atlas tree, map rolls, and additional Scarabs to maximize the total rare monster count so you're cracking 25 to 35+ essences per map instead of the typical 5 to 10. The strategy is dead simple in execution: enter the map, Vaal Orb every essence pillar to gamble upgrades and corrupted-essence transformations, kill the imprisoned monster, loot, repeat, then exit. Profit is driven primarily by Deafening essences (the top-tier normal essences) and Corrupted essences (Envy, Woe, Delirium, Insanity, Horror, Hysteria), which sell for 3 to 15 times more than standard essences. Expected returns scale with clear speed rather than gear investment, making this strategy accessible on tier 8 maps for weaker builds all the way up to T16 for players who want experience gains and side loot alongside essence profit. The biggest execution nuance is map choice, where the wrong pick can cost you 50% of your essence yield per map, so following the map selection guidance below matters more than it does in most other strategies.
1. Understand the Core Mechanic
The Essence Scarab of Calcification converts every rare monster that is a natural inhabitant of the map into an essence-imprisoned monster. Critical caveat: "natural inhabitant" means monsters that spawn from the base map, not monsters added by league mechanics (Breach, Legion, Ritual, etc.), so league-mechanic rares don't count for essence conversion. This is why your entire strategy centers on maximizing natural rare monster count via map rolls, Atlas tree, and rare-adding Scarabs rather than adding league mechanic density.
Each essence pillar can be Vaal Orbed once, which either upgrades the essence tier, transforms it (potentially into a Corrupted essence), leaves it unchanged, or destroys it. With the Essence Scarab of Stability slotted, destruction is removed as a possible outcome, meaning every Vaal Orb use is a pure upside gamble.
2. Character Requirements
This strategy works best on characters with decent single-target damage and enough tankiness to survive multi-mod essence rares. Essence-imprisoned monsters can roll dangerous modifier combinations, so squishy glass cannons will struggle even at lower tiers. If your build is weak, drop down to T8 to T12 maps, essence yield per map is nearly identical since the strategy scales off rare monster count, not map tier. If your build is strong, run T16 for experience gains and side loot without any real downside.
Be aware this strategy involves heavy clicking (both to Vaal Orb pillars and to pick up dropped essences), so players with RSI or wrist issues should either take frequent breaks or skip this farm entirely.
3. Scarab Setup (Five-Slot Loadout)
Slot these five Scarabs every single map:
Essence Scarab of Calcification – Mandatory. Converts every natural rare into an essence monster. The entire strategy is built around this Scarab.
Essence Scarab of Stability – Mandatory. Prevents Vaal Orbs from destroying essences, restricting outcomes to upgrades or transformations only. This transforms Vaal Orbing from a risky gamble into a pure positive-EV action.
Essence Scarab of Ascent – Increases essence tier. Straightforward upgrade to your average essence value per drop.
2× Scarab of Adversaries – Each adds 4 additional packs of mirrored rare monsters that count as base monsters, so they convert into essence mobs. These two Scarabs are the single biggest source of extra essence density in the setup.
4. Map Rolling (Blue Only)
Do NOT alch or corrupt these maps. The strategy uses blue-rolled maps exclusively for one specific modifier:
Search only for "Map contains X% increased number of Rare monsters" – This is the ONLY modifier that matters. Quality, quantity, rarity, and pack size are irrelevant.
Buy stacks of blue-rolled maps in bulk or Transmute + Augment your own map pool. Set a stash tab search filter for "number of rare" (in quotes) to instantly identify rolled maps.
Avoid negative max resistances – Essence rares can still hit hard, and negative max res significantly increases death risk for marginal profit.
Rare monster count rolls frequently, so rolling maps in bulk is fast and cheap.
5. Map Choice (Density-Weighted Selection)
Map choice can swing essence yield by up to 50%, making it the single most important optimization in the strategy.
Bazaar is the top pick – Density weight of 10, decent layout, easy boss, and solid Divination Card pool (Slumbering Beast, Miracle, Silly Boy, though these cards are extremely rare drops). Testing averages roughly 30 essence monsters per map on Bazaar.
Avoid Mesa – Density weight of only 3, testing averages just 20 essence monsters per map, which is 50% less yield than Bazaar despite an easier layout.
Alternative high-density maps – Use mapsofexile.com and sort by density weight of 10 to identify candidates. Skip any high-density map with poor layout scores (like Pit and other layout-4 maps), since bad layouts cost more time than the extra density gains.
6. Atlas Passive Tree
Two node categories are mandatory. Everything else is optional and flexible based on your secondary interests.

Mandatory: Full Essence Cluster (Except Crystal Resonance)
Take every essence node in the Atlas tree except Crystal Resonance. The reasoning: Crystal Resonance transfers all essence modifiers from imprisoned monsters onto the map boss (a positive), but it also causes Vaal Orbs used on imprisoned monsters to replace all essences on that monster with a single essence type chosen from the imprisoned monster's current pool. In practice, this second effect significantly reduces your Corrupted essence yield because you now have to hit the corrupted essence on the Vaal Orb roll AFTER already hitting it on the initial spawn, making the strategy far more feast-or-famine. Skip Crystal Resonance unless your build can trivialize a 30-essence boss encounter and you specifically want that high-variance playstyle.
Mandatory: Increased Effect of Explicit Modifiers on Maps
Take every node that increases the effect of explicit map modifiers (Multiplying Modifiers, Map Modifier Effect, Mounting Modifiers, and similar). These nodes scale the "increased number of rare monsters" roll on your maps, which is your entire density source. Also take any Atlas nodes that directly grant "increased number of rare monsters in your maps."
Optional: Secondary Mechanic (Choose One)
Heist (Recommended) – Take Smuggler's Cache nodes for extra Rogue Marker income, blueprint drops, and side currency. This is the current recommended secondary since it doesn't slow your maps and generates meaningful passive income.
Betrayal – Take Katarina and Mastermind nodes. Note that the Mageblood Divination Card farm from "It That Fled" has been nerfed heavily this league, so Betrayal is worse than in previous leagues but still functional.
Bestiary (Einhard) – Take the full Bestiary cluster for beast farming. Warning: this makes essence rares harder since they can roll beast-influenced mods.
Shrines – Take the Shrine cluster for clear speed and survivability, purely a QoL choice that doesn't add profit but makes maps smoother.
7. Execution Loop
Each map runs on a simple repeatable pattern:
Enter the map and start clearing toward the boss.
Vaal Orb every essence pillar you find, no exceptions. Vaal Orbs are cheap, essence transformations are always positive-EV with Stability slotted, and thinking about whether individual essences are "worth" corrupting wastes more time than it saves. Corrupt everything on autopilot.
Pop the essence to release the imprisoned rare, kill the pack, and loot dropped essences.
Kill the map boss for experience and side loot (optional if you're speed-farming lower tiers).
Exit the map and load the next one.
The mechanical simplicity is a major strength, there are no priority orders, no slingshot mechanics, no complex decision trees. Just corrupt, pop, kill, loot.
8. Selling Strategy
Essence pricing has small margins that compound significantly over hundreds of maps, so proper listing technique matters.
Sell standard essences in stacks of 10 – Most essences trade at fractional Chaos ratios (e.g., 1.4c each). Multiply by 10 and list stacks of 10 for the exact fractional value (10 essences for 14c). Never round down to the nearest whole number, this loses meaningful profit at scale.
Sell Deafening essences of Woe, Zeal, Anger, Contempt, etc. for Chaos in stacks of 10 – Standard listing.
Sell top-tier Corrupted essences (Envy, Woe, Insanity, Horror, Delirium, Hysteria, Dread, Scorn) individually or in small stacks for Divines – These trade at 1 Divine to 15 to 25 essences typically. Use the stash's "show stash" feature to quickly bulk-price essences by ratio.
Early league, list mostly in Chaos – Divine buy orders on essences don't fill reliably until crafters ramp up around week 2. Later in the league, transition top-tier essences to Divine pricing.
Check ratios carefully – If an essence lists at 15.5c each, sell 2 for 31c rather than losing the 0.5c margin per unit. These fractional gains compound into significant Divine income over a full farming session.
9. When to Farm Essences
Essence farming is at its strongest starting roughly one week into the league, once crafters are actively spamming essences onto Fizz weapons, fractured chest bases, and armor pieces for high-life plus multi-res outcomes. Demand stays elevated throughout the league since essences are consumed permanently rather than duplicated, so this strategy has one of the longest profitable windows of any farm in the game. Prices may drop as more players adopt the strategy after guides publish, so front-load your Scarab purchases and lock in early-week profits when Deafening and Corrupted essence prices are peaking.
12. PoE 3.29 Delirium Atlas & Farm Strategy (20+ Divines Per Hour with Astrolabe Rewards)
The Delirium Rush farm has emerged as one of the top-performing trade league strategies in 3.29 following the underwhelming reception of the Legion, Breach, and Abyss reworks, and it currently generates over 20 Divines per hour for players who can execute the map speed requirements consistently. The strategy's profitability stems from three overlapping income streams that all remain strong in the current market: cluster jewels are still commanding high prices, Delirium Orbs retain decent value, and, most importantly, the Astrolabe reward encounters accessible via the bottom-right Atlas region drop significant Scarab payouts (Scarab of Catalyzing, Breach Scarabs, and Essence Scarabs). The core concept is speed-based: rush through a Delirium mirror at map entry, race toward the boss while killing as many monsters as possible along the way, hit seven reward tiers before the boss, and use the guaranteed +1 reward tier from the boss kill to finish every map at 8 rewards. Execution efficiency is what separates profitable Delirium Rush runners from break-even ones, the strategy requires roughly 2.5-minute maps and at least 20 maps per hour to hit the 20+ Divine benchmark. Unlike heavier juicer strategies, this farm doesn't need 8-mod corrupted maps or expensive Scarab loadouts, making it accessible to any character that can clear a T16 quickly and survive scaling Delirium fog density.
1. Understand Why Delirium Wins in 3.29
Before committing to this strategy, understand the specific market conditions making it profitable right now:
Cluster Jewels remain expensive – These are still commanding strong prices, and Delirium is the primary source, so every map generates cluster jewel income directly.
Delirium Orbs hold decent value – Not at previous league peaks, but strong enough to contribute meaningful profit per map.
Astrolabe rewards are the sleeper income source – The bottom-right Atlas region rewards drop Scarab of Catalyzing, Breach Scarabs, and Essence Scarabs, which stack into substantial per-map value that most players overlook.
Legion, Breach, and Abyss are underperforming – With the three big league mechanic reworks landing weaker than expected, Delirium fills the mid-league juicer slot that would normally be contested by those mechanics.
The main risk to the strategy is cluster jewel prices dropping as more players farm them, but Delirium Orb prices are also trending upward, so if Orbs recover to prior league values, this strategy could become dramatically more profitable rather than less.
2. Character Requirements
Delirium Rush demands consistent speed rather than tankiness or high single-target damage:
Fast clear speed is mandatory – You need to complete maps in roughly 2.5 minutes to hit 20+ maps per hour, which is the profit benchmark.
Enough tankiness to survive scaling Delirium fog – Delirium monsters get progressively tankier as fog depth increases, especially near the end of longer maps like Tropical Island.
Movement skill or high move speed – Essential for rushing the boss while collecting reward tier progress.
If your build can clear T16 Delirium fog reliably at speed, you're ready for this strategy.
3. Map Choice (Tropical Island vs Strand)
Map selection directly affects your Astrolabe reward pool, which is where much of the profit actually comes from:
Tropical Island is the top pick – Its position in the Atlas grants access to the bottom-right region Astrolabe rewards, which drop currency and Scarabs (Catalyzing, Breach, Essence). This is where the sleeper profit sits.
Strand is the alternative – Shorter and easier to clear, but the Astrolabe reward region drops Divination Cards and Unique items instead of Scarabs, which is less consistent income.
Tropical Island trade-off – It's a longer map than Strand, and Delirium monsters near the end get significantly tankier. If your build struggles with tanky late-map Delirium mobs, Strand may be more efficient for you.
Choose based on your build's ability to handle scaling Delirium tankiness deeper into the map.
4. Scarab Setup
The Scarab loadout centers on Paranoia and Mania Scarabs, with flexibility based on your comfort level:
4× Delirium Scarab of Paranoia + 1× Delirium Scarab of Mania (default setup) – The balanced setup for most builds. Paranoia scales Delirium reward tier gain, Mania adds additional reward pressure.
5× Delirium Scarab of Paranoia (harder map, higher cost variant) – Use if your build can handle denser Delirium fog. Increases per-map cost but pushes reward tiers higher faster.
Delirium Scarab of Delusions (with Breach Scarabs) – Not recommended right now – This variant drops significantly more Simulacrum Splinters, but Simulacrum prices are currently poor, so the extra Splinter drops don't offset the Scarab investment. Skip until Simulacrum prices recover.
The right setup depends entirely on your clear speed and how quickly you can push through a denser Delirium mirror without losing map time.
5. Map Rolling (Alch and Go)
Unlike heavier juicer strategies, Delirium Rush does NOT require 8-mod corrupted maps:
Alch and Vaal is sufficient – The Delirium reward tiers scale off Delirium depth, not map modifier count. 8-mod corrupted maps don't meaningfully improve per-map profit relative to their cost.
Skip expensive map rolling – Save your Vaal Orbs, Chaos Orbs, and time. Just Alch, Vaal, and run.
Watch for bricking mods – Avoid modifiers your build hates (no leech, no regen, ele reflect, phys reflect based on damage type), but don't waste currency rerolling for "perfect" rolls.
The volume model of this strategy means map preparation should take seconds, not minutes.
6. Atlas Passive Tree
The Atlas tree is deliberately focused, allocating only Delirium nodes and blocking almost everything else:

Full Delirium cluster – Take every Delirium node available for maximum reward tier gain and monster density.
BLOCK Delirium itself in the Atlas – This is counterintuitive but critical: blocking natural Delirium spawns forces you to use an Astrolabe to guarantee a Delirium mirror in every map. Without this, natural Delirium spawns become inconsistent and dilute your Astrolabe usage.
Block all other mechanics – Breach, Legion, Expedition, Ritual, Abyss, Harvest, and anything else you don't want cluttering your maps. This is a pure Delirium tree, so mechanic contamination directly costs you map time.
Blue Altars over Red Altars – Blue Altar invitations are worth significantly more currency than Red Altar drops, and Blue downsides are less lethal on speed-focused runs. Additionally, Red Altar Chaos drops slow you down since you'd need to stop and pick them up, which breaks your 2.5-minute pace.
Keep the tree lean, this strategy is about volume and pace, not stacking every possible modifier.
7. Execution Loop (2.5-Minute Target)
Speed discipline is everything on this strategy. Follow this exact pattern every map:
Enter the map and immediately locate the Delirium mirror (spawned by your Astrolabe usage).
Run through the mirror to activate the fog.
Rush toward the boss while killing every monster along the way. Do not stop for full clears, do not backtrack for missed packs.
Aim to reach 7 reward tiers before the boss fight – The boss kill grants +1 reward tier automatically, closing the map at 8 total rewards.
Kill the boss quickly – Boss survivability matters here, but so does DPS since you're on a 2.5-minute clock.
Exit and reload.
The 2.5-minute target × 20 maps per hour is the profit benchmark. Slower runs still profit, but the divines-per-hour rate collapses significantly below this pace.
8. Optional Side Activities (Efficiency Trade-Off)
The strategy has natural side content that can boost per-map profit at the cost of run speed:
League mechanics on the way – Trigger league encounters (Ritual, Expedition, etc.) if they're directly on your boss path. Skip anything requiring detours.
Coral Maps – Worth stopping for since they're valuable per-drop, but only if they're not far off-route.
Eater of Worlds Altars – Check them yourself for bonus loot, but only if they're roughly on your rush path.
The purist approach is skipping all side content and maximizing map count per hour. The alternative is stopping for high-value optional loot at the cost of hitting fewer maps per hour. Test both and see which profits more with your specific build's clear speed.
9. Market Awareness and Exit Conditions
Delirium Rush profit is sensitive to two specific market variables that you should track:
Cluster Jewel prices – These naturally decline over the league as supply catches up with demand. Track your favorite cluster jewel notables and adjust expectations weekly.
Delirium Orb prices – Currently at decent but not peak values. If Delirium Orbs spike (typical mid-league behavior as juicers stock up), your profit per map rises without any changes to the setup.
Exit the strategy when:
Cluster Jewels drop below profitable thresholds for your specific tree paths.
Delirium Orb prices crash below break-even for the Scarab investment.
You've accumulated enough currency for a major build upgrade and want to transition to a higher-ceiling farm like Nightmare Maps or Ethereal Allflame.
Because the strategy has low Scarab investment relative to profit, it remains one of the most flexible farms to enter and exit as market conditions shift throughout the league.
13. PoE 3.29 Blight Atlas & Farm Strategy (Salvage Bin Jackpots & Blighted Map Sustain)
The Titanic Blight strategy is one of the strongest specialist farms in 3.29 because it converts a low-competition, skill-check mechanic into a repeatable jackpot loop that most of the player base won't touch. The core engine is straightforward: Titanic Scarabs of Treasure force Blight bosses to become juiced Unique monsters that scale directly off Pack Size, meaning every percent of Pack Size you roll on your map compounds into extra Quantity and Rarity on already-loaded boss drops. Stack that with the Fungal Horizon notable (which grants a chance to spawn a special Blighted chest that can drop 20 to 30 Blighted Maps in a single encounter on lucky rolls) and Temporal Ingenuity (which converts every completed tower into a Salvage Bin at the end of the encounter), and every successful Blight becomes a triple payout: boss unique drops, Blighted Map drops, and Salvage Bin loot from your tower placements. On top of that, oils remain a permanent-demand crafting resource, Blight barely has any competition since it requires actual tower-placement knowledge, and the strategy is completely compatible with even weak builds thanks to Cassia's Pride being viable (you can effectively AFK the encounter while your towers do all the work). It's a genuine "second-half-of-league" farm that scales from Alch-and-Go 4-6 mod maps all the way up to fully juiced T16.5 corrupted maps with Maven Chisels.
1. Map Selection (Dunes is King)
Map layout directly controls how many Blight lanes spawn, which is the single biggest multiplier on your loot:
Dunes is the top pick – Its wide-open layout gives Blight encounters the maximum chance to spawn additional lanes. More lanes = more enemies = more loot. It's that simple.
Map tier and rolling scales with your budget:
Beginner: Tier 16 Alch-and-Go (4 to 6 mods) — cheapest entry point to test the strategy.
Standard: 8-mod corrupted Tier 16 maps — the sweet spot for most runners, best profit-to-cost ratio and typically the go-to setup even in leagues with T16.5 available.
Full push: Tier 16.5 maps rolled for Pack Size, Rarity, Quantity, and optionally Currency — only worth pushing if Maven Chisel prices are favorable, otherwise 8-mod T16 corrupted maps produce better margins.
Historically the T16.5 push hasn't been price-worthy compared to standard 8-mod corrupted maps, so start with 8-mod corrupted as your default until you verify Chisel prices justify the upgrade.
2. Scarab Setup (Titanic Treasure Core)
The Scarab loadout is fixed and centered on Titanic scaling:
1× Blight Scarab of the Blightheart – Guarantees the big end-of-encounter chest, which pairs with Fungal Horizon for the Blighted Map jackpot.
1× Blight Scarab of Titans (Titanic) – The core scaling piece that transforms Blight bosses into juiced Uniques.
3× Titanic Scarab of Treasure – Triple stacks the Unique monster loot multiplier so every Blight boss becomes a piñata of drops.
Since Titanic Scarabs scale off Pack Size, your map rolling priority becomes clear: maximize Pack Size above all else. Every percent of Pack Size feeds directly into extra Quantity and Rarity on the Titanic-buffed Unique monsters that spawn as your Blight bosses.
3. Atlas Passive Tree

Take these clusters in this priority order:
Full Blight cluster (all nodes except Cassia's Pride by default) – Cassia's Pride is optional and situational; if your build is undergeared, allocating Cassia's Pride is completely viable because Titanic towers do the damage for you (you can effectively AFK the encounter with proper tower placement).
Fungal Horizon – Critical in 3.29 since Abyss and Legion rewards were removed from Blight. This notable grants a chance for a special Blighted-only chest to spawn at the end of the encounter, which can drop 20 to 30 Blighted Maps on lucky rolls and has a reopen chance. This is where the Blighted Map jackpot lives.
Temporal Ingenuity – Every completed tower transforms into a Salvage Bin at the end of the encounter. To maximize this, you need to build as many towers as possible AND build every tower type (6 total: Chilling, Shock Nova, Empowering, Seismic, Summoning, Fireball) since Salvage Bin rewards scale off tower count, level, and variety.
Blight encounter guarantee nodes (4 points) OR Fungal Astrolabe path – Three specific nodes plus the guarantee node together give 100% chance for Blight to spawn in your maps. Alternatively, respec those 4 points and use Fungal Astrolabes instead if their market price is cheap enough.
Synthesis Stability – Take this if you're using Fungal Astrolabes so you can spam the same map repeatedly without needing to progress a fresh questline.
Scarab chance and containment nodes – 200% increased chance to drop Scarabs pairs incredibly well with the massive Unique monster kill count, and the "Scarabs found in maps are less common variants" mod amplifies this further.
Map upgrade chance nodes – These regularly proc T17 map drops from Salvage Bins and Blighted chest explosions, so they're worth grabbing for the extra map value.
Middle Quantity and Rarity wheels + Increased Effect of Explicit Modifiers – Standard meta juicing that's been strong for the past 3 to 4 leagues, no reason to skip it here.
Influence path (Eldritch OR native, either works) – Totally optional based on preference. Pick whichever feels better for your build.
4. Ring Anointments (Chilling + Meteor Towers)
Ring anointments are critical for the Titanic Blight setup because they add two extra tower types on top of the base tower selection:
Chilling Towers Freeze Enemies for 4.2 Seconds – Anointed with 1 Silver Oil + 1 Opalescent Oil.
Meteor Towers Create Burning Ground – Anointed with 1 Indigo Oil + 1 Violet Oil.
Chilling Towers are essential for holding choke points, and Meteor Towers add burning ground for consistent AoE damage. These two anointments transform your tower kit from "functional" to "AFK-viable."
5. Execution (Choke Point Strategy)
The standard Titanic Blight execution follows a predictable pattern:
Trigger the encounter – Look for 8 lanes total on Dunes (higher is better; sometimes you get lucky with a single main lane, sometimes multiple).
Set up your primary choke point – Standard combo is 1× Chilling Tower + 1× Seismic Tower to hold the lane, plus 1× Empowering Tower adjacent to boost both. This choke point handles all Blight bosses in most encounters.
Use the market pause trick – Bind your market key (K by default for many players). Pressing it opens the market UI and pauses the Blight encounter, letting you build and upgrade towers for free without wasting encounter time. Use this pause aggressively throughout the fight.
Build all 6 tower types for Salvage Bin scaling – Chilling, Shock Nova, Empowering, Seismic, Summoning, and Fireball. Salvage Bin rewards scale off variety, so a diverse tower setup pays off at the end.
Upgrade all towers to max level before encounter completion – Salvage Bin quality scales off tower level too, so before the last boss dies, pause via market and max-upgrade every tower.
Loot the Salvage Bins after the encounter ends – Open every Salvage Bin. Rewards are RNG, sometimes garbage, sometimes Divines and Vaal Temple puzzle boxes, but volume across many encounters averages out to strong profit.
Full encounters run about 2 to 3 minutes even on a Cassia's Pride setup where your character deals zero damage, making this one of the few farms you can genuinely tab out and semi-AFK.
6. Selling Strategy
Blight income comes from three streams and each needs different market handling:
Golden and Silver Oils – Always list individually at maximum price. These are the top-tier sellers and drive most of your profit.
Lower-tier Oils – Bulk-sell in stacks of 10 or 20 for fast turnover.
Blighted Maps – Stockpile these for dedicated Blighted Map farming sessions later, or bulk-sell in stacks once you have 50+ if you don't plan to run them personally.
Unique monster drops (Titanic boss loot) – Price-check every Unique that drops from Blight bosses since Titanic multiplies both quality and quantity of Unique drops. Occasionally you'll hit build-defining chase pieces.
T17 map drops – Sell individually since T17s command strong prices throughout the league.
Watch anointment demand – Certain anointments spike in price mid-league (typically week 2 to 3), so track the meta and time your Oil sales for maximum profit.
13. PoE 3.29 Nightmare Map Farming (Highest Divines-per-Hour Ceiling)
Nightmare Map Farming is the highest-return day-one strategy in 3.29 for players with solid characters, and it works exceptionally well right now because Scarab prices remain elevated while 8-mod corrupted maps sell for 3 Chaos each and Nightmare maps sell for 35 to 40 Chaos each. The concept: run 8-mod corrupted T16 maps stacked with Altar downsides and map duplication nodes so every completed map essentially pays for itself in re-rollable stock (via 8-mod map drops) while dropping Nightmare maps as pure profit. This farm requires a strong character to survive 8-mod maps with Altar downsides, so it's best attempted once you've hit around level 90 with decent defensive layers. Expect roughly 8 to 10 Divines per hour when Scarab prices are still favorable in the first two to three days. The main gate here is character strength: 8-mod maps day one with Altar downsides are extremely rippy, and you'll hit a level 96 wall if you can't survive the mod combinations reliably.
Step 1: Verify Character Readiness
Confirm your character has at least 4K to 5K effective HP with capped resistances before attempting this farm. 8-mod maps with Altar downsides can absolutely delete squishy builds, so don't attempt below level 90 or without solid gear. Expect deaths past level 96, that's the natural ceiling for this farm without perfect gear.
Step 2: Build the Atlas Tree
Take a central Atlas layout focused on map quantity and map duplication. Allocate every map effect and quantity node. Take Blue Altars over Red Altars since Red downsides are too deadly on 8-mod maps unless you're CI. Grab the full Nightmare map cluster for maximum drop chance. Take all map duplication nodes since they multiply your Nightmare map returns.
Step 3: Block Unwanted Mechanics
Block Breach, Expedition, Ritual, and other mechanics you don't want cluttering your maps. This dramatically increases both Altar spawn rate and Nightmare map drops.
Step 4: Set Up Scarabs
Slot three Cartography Scarabs of Multitudes for extra rare monster mods and map drops. Add one Cartography Scarab of Escalation for an additional map mod. Add one Cartography Scarab of Corruption for a 10 percent chance to corrupt map drops. Use every Scarab slot since this setup fully pays for itself via 8-mod map drops.
Step 5: Optional Scarab Swap
Once Nightmare maps become saturated (usually day three to four), swap Cartography Scarab of Corruption for a Magic Pack Size Scarab to keep raw loot returns high while 8-mod prices normalize.
Step 6: Roll and Run Maps
Roll 8-mod corrupted white maps. Take Blue Altar downsides freely since your build should handle them. Focus on map completion, boss kills, and rare monster kills for extra map drops. Prioritize speed over full clears since you're chasing map completion volume.
Step 7: Sell for Maximum Profit
Bulk-sell your 8-mod maps in stacks of 20 or 100 to cover Scarab and map costs. List Nightmare maps individually for maximum profit at 35 to 40 Chaos each, or bulk-sell them in stacks of 10 once you have over 50 in stock.
Step 8: Watch for Market Crash
Nightmare map prices crash mid-week (usually day three to four) as supply catches up. Lock in profits early by selling aggressively during the first 48 to 72 hours, then pivot to Altars & Go or transition into Delve/Harvest to maintain your Divines-per-hour rate.
14. PoE 3.29 Abyss Farming Strategy (New Pinnacle Boss & Revamped Spawns)
The Abyss revamp in 3.29 turns Abyss from a slow, cracked-ground chase into an aggressive, monster-density-focused mechanic. Abyssal Pits and cracks are now already open when you enter the area, and nearby enemies get sucked into the pit, the more monsters die near it, the faster the Abyssal Legion pours out. This makes Abyss function much like it does in Path of Exile 2, where dense packs feed the mechanic and generate massive quantities of rares. Combined with the fact that Abyss is now the exclusive source of Abyssal Jewels and Stygian Vises, plus a brand-new Abyss Endgame Pinnacle Boss with its own unique item drops, Abyss looks positioned to become the spiritual successor to Breach for mid-league juicing. The mechanic is a bit unpredictable at launch since we don't have full drop data yet, but based on how similar Abyss-style mechanics have performed in PoE 2, this could be one of the most profitable farms once players figure out the optimal setup.
Why Abyss Works in 3.29
Exclusive source of Abyss Jewels and Stygian Vises = permanent demand from every build in the game.
Auto-spawning cracks cut out the tedious "chase the crack" gameplay from previous versions.
New Pinnacle Boss drops unique items that could become chase pieces.
Abyssal Delirium Orbs removed, but that opens up cleaner map setups without needing to layer Delirium.
1. Atlas Tree
Allocate the full Abyss cluster for extra spawns, extra rares from Abyss, and increased chance for Abyssal Depths (mini-dungeon) to spawn.
Take the Abyssal Scarab of Crystals enabling node if available in the tree.
Keep the Shaping Trio for base monster density.
Block competing mechanics (Breach, Expedition, Ritual).
2. Scarab Setup
Abyssal Scarab of Crystals (new 3.29 scarab, expected to boost jewel and unique drops from Abyss).
Abyssal Scarab of Multitudes (more Abyss monsters).
Abyssal Scarab of Emptiness (removes non-Abyss content to focus map on Abyss only) — great for pure jewel farming.
3. Map Choice
Prefer open-layout maps with dense monster packs (Dunes, City Square, Beach, Fields).
Run T16 corrupted maps with high pack size for maximum souls feeding the pit.
4. Execution
Locate the Abyss crack (already open at map entry).
Kill monsters near the pit aggressively; the more souls you feed, the more the Abyssal Legion pours out.
Follow the crack progression until an Abyssal Depths portal spawns, always enter these mini-dungeons since they contain the Abyssal Liches, which are the primary Stygian Vise and jewel droppers.
Once you're strong enough, save fragments to attempt the new Abyss Pinnacle Boss for unique item drops.
5. Selling Strategy
Abyssal Jewels with searching mods (curse on hit, minion damage while holding shield, etc.) can sell for tens of Chaos to multiple Divines.
Stygian Vises with high life rolls or +1 abyssal socket are always in demand.
Bulk-sell Abyss Splinters and any Pinnacle Boss fragments as they drop.
15. PoE 3.29 Ultimatum Atlas & Farm Strategy (Inscription Jackpots & T0 Trial Master Uniques)
The Ultimatum farm is one of the most low-investment, high-ceiling strategies in 3.29 and it's genuinely playable from the moment you hit maps, which makes it a rare "true league-start" farm with real jackpot potential. The core engine works because Ultimatum encounters guarantee catalyst rewards on specific waves (traditionally waves 4 and 8), and by combining Ultimatum passive tree bonuses with the right Scarab layering, you can shift those guaranteed rewards to round 1, meaning every single Ultimatum encounter you complete has a chance to drop T0 Inscriptions, Sacred Orbs, Divines, and chase Trial Master unique items right out of the gate. On top of that, Ultimatum Scarabs (bribings, inscriptions, catalyzing, jewelings) are typically dirt-cheap at league start because most players don't understand the guaranteed-catalyst math, so you get to piggyback on Trial Master uniques (Glimpse of Chaos, Machinations, Altar of Temptation support gem, Ignominy) that spike hard in early league before crashing. It's also compatible with weak builds since you can run it at T11 while gear is still coming online and scale up to T14 for Trial Master spawns and T16 for T0 Inscription eligibility. The main caveat is that Sinistral and Dextral currency status going into 3.29 is unknown, so treat any endgame Ultimatum currency assumptions as tentative until launch confirms availability.
1. Early Atlas Passive Tree (First 50 Points - Pure Map Progression)
The first tree is straightforward: skip every league mechanic and rush pure Atlas points to unlock the second tree:
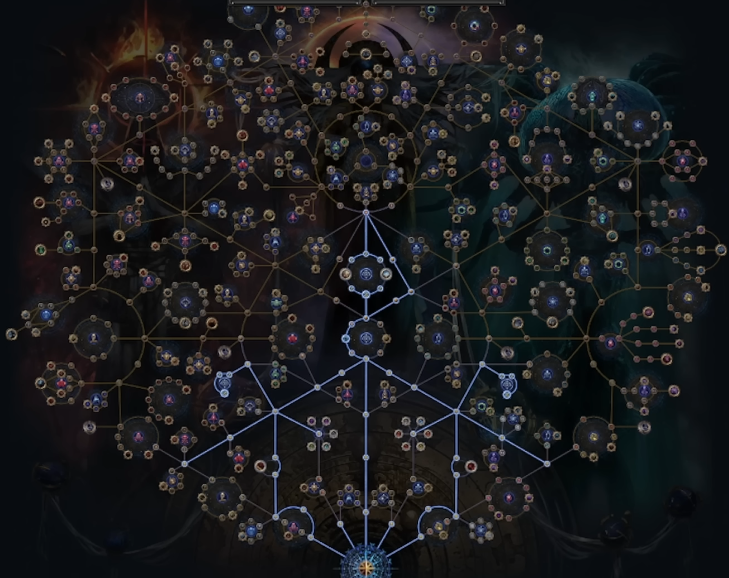
Priority 1: Take the two higher-tier map nodes on each side of your starting area (four points total across both branches).
Priority 2: Path toward the additional higher-tier map nodes deeper in each direction.
Priority 3: Fill in generic map sustain nodes (map drop chance, map quantity) in order: 1, 2, 3, 4.
Do NOT take Breach even though it's a strong XP mechanic early. You don't need XP, you need Atlas points to unlock the second tree.
Do NOT take any league mechanic clusters at this stage - the entire first tree is about reaching the 50-point second-tree unlock as fast as possible.
2. Second Atlas Passive Tree (Full Ultimatum Focus - 48 Points)
Once you unlock the second tree, the allocation is dead simple: it's all Ultimatum, and you don't even need all 48 points to be effective:
Take the Ultimatum encounter cluster and Ultimatum Scarab drop nodes - Ultimatum Scarabs (especially bribings) sell for solid Chaos and are valuable to drop naturally.
Skip the 3 optional points near the entry - they're not impactful enough to prioritize.
Take Increased Radius on Stone Circles - even though you don't want Stone Circles ideally, the increased radius allows overlap plays when they do spawn.
DO NOT take Ruin's Wake.
DO NOT take Increased Chance for Poison Circles.
Take the three "good" circle bias nodes and skip Stone Circles priority.
Take Increased Currency, Increased Uniques, and Increased Divination Cards - the Divination Card node is debatable because most Div cards are trash, but taking it "rations out" the truly worthless drops (maps, fragments) so it's a net positive. Skip it if you want a purer currency focus.
DO NOT take Traps and Mines or Trauma Master nodes early - your build is too weak in hours 1 to 8. Path into these around hour 10 to 12 once your gear can survive dense Ultimatum mob spawns, at which point Trauma Master becomes very strong.
Optional after 100+ maps: Path into Searing Exarch or Eater of Worlds altars for extra currency generation on the way to and during Ultimatum encounters.
3. Map Tier Progression
Ultimatum has specific tier requirements for the best drops:
Start at T11 - safe, sustainable, and lets you learn the tree modifiers without dying constantly.
Move to T14 - this is the tier where Trauma Master starts spawning, which is essential for unique-hunting.
Push to T16 when you can - T16 maps are the requirement for T0 Inscriptions to appear in the drop pool.
If you're dying too much on T16, drop back down to T11 without shame. Volume of successful Ultimatums beats dying on juiced maps.
4. Scarab Setup (Progression from No Scarabs to Full Jackpot)
Scarab strategy scales with your currency budget:
Hour 1 to 6: No Scarabs at all. Scarabs don't drop naturally yet, and buying is not worth it. Just run naked Ultimatums for practice and early rewards.
Budget tier: 1× Bribing Scarab - Bribings are amazing but only buy them under 8 Chaos each. Above 8c, doubling up becomes 16c per map which is too much strain on early-league currency.
Recommended tier: 1× Bribing + 1× Inscription - This is the sweet spot combo. Ultimatum guarantees a catalyst on wave 4 and wave 8. The Bribing adds +2 rounds and the passive tree adds +1 round, shifting the guaranteed catalyst reward from wave 4 to wave 1 and the second one from wave 8 to wave 4 or 5. This means every single Ultimatum guarantees an Inscription on round 1, which means potential T0 Inscription drops from the very first wave (historical example: Bino's Inscription dropped on round 1 in 3.27). Only run this combo when Inscription Scarabs are cheap - they usually are since they drop in high quantities.
Full jackpot tier: Inscription + Catalyzing - Catalyzing forces every Ultimatum reward to be a catalyst. Combined with Inscription, your entire Ultimatum becomes Inscription farming, hunting for Divines, T0s, T1s, and T2s. T2s like Rapid Globe typically sell for 5 to 10 Divines each. Chase T0s and T1s include Thunderfist, Asenath's, and the top Trial Master uniques.
Optional: Jeweling Scarab - Priced between 4 and 15 Chaos usually. Never buy at 25c+. Jewelings are almost always break-even to profitable because the passive tree guarantees a stack of catalysts per encounter. Assuming 10 catalysts per stack at 1 Chaos each = 10c minimum, plus tainted catalyst drops (2 to 5c each) push you into profit.
Trial Master Unique Farming: Adding Trial Master to your runs opens up Glimpse of Chaos (solid early), Hateforge (meh), Ignominy (1 to 2 Div early), and Machinations of Mahuxotl (very expensive early league). The Altar of Temptation support gem was ~5 Div each in past leagues and Machination support was ~1 Div. The downside is Trial Master fights are slow and eat 30 to 40% extra time per map, so only run Trial Master when its uniques are under ~10 Chaos to spawn. Above 10c, skip it and focus on map throughput.
5. Ultimatum Modifier Tier List (Pre-Blood Magic)
Before you have Blood Magic keystone, follow this tier list for mod selection during Ultimatum encounters:
Always Take (Free):
Bleeding blades - free damage since we degen mods effectively.
Boss enemies - free experience and reward.
Modifier enemies (the two "extra modifier" nodes) - crystals start degenning which is extra DPS for you.
Fills mana and ES on hit - we're using magic, doesn't matter, and removing ES helps guarantee stuns without Ostiek.
Creatures auras - doesn't affect Chieftain fire builds.
Cannot be stunned/slowed - doesn't matter for our clear.
Block chance, Kindling flask, Cannot be evaded, Immune to criticals, Resistances, Mana - all no-impact for the build.
Rare mods, Ice mods (unless Stone Circles), Cooldown mods, Poison mods, Curses, Suppression - mostly harmless.
Take Cautiously (Situational):
Ignore PDR - annoying but survivable.
Less damage dealt - annoying but survivable.
Fire/Lightning mods 1, 2, 3 - safe to take, but skip Fire 4 and Lightning 4 because they burst through block early game.
Add chaos damage, Degen mods, Less recovery, Prismatic monsters - forced picks but manageable.
Never Take (Absolute Worst):
Increasing damage taken - this debuff makes YOUR Righteous Fire deal 1.5x damage to you AND everything else deals 1.5x. Absolute bottom-tier pick.
Small arena - causes burst death, always skip.
No block chance - we rely on block for survival, so this is a death sentence.
Ruin - flat "no" pick.
No regen, No flasks - flat "no" picks.
Steal charges (endurance) - removes your defensive layers.
Crits (Exception) - Only skip on wave 1. From wave 2 onwards, you gain crit immunity from having been stunned in the past 4 seconds, so crits become safe. BUT if the map has "monsters gain added as cold" or similar cold-conversion mods, NEVER take crits - freeze crits will delete you.
6. Ultimatum Modifier Tier List (Post-Blood Magic)
Once you unlock Blood Magic keystone, the tier list flips dramatically:
Small arena becomes the best pick - clears quickly and is basically free with Blood Magic scaling.
Blades, Lightning, Fire mods 1 to 3 remain free. Still be cautious of Fire 4 and Lightning 4 if your gear is still early - the Blood Magic nerf hurts and dangerous damage mods can compound with all-damage/region mods to threaten one-shots.
Block mods become free to take.
Do NOT take Curse Immunity or Curse Reflect post-Blood Magic. If you're running a Trial Master with Curse-on-Hit mobs, curse immunity means you can't curse the boss, which kills your single-target DPS.
Crits (Exception) - same rule as before, skip on wave 1, safe after wave 2 unless cold conversion is present.
If you have Mageblood, flask-related mods stop mattering entirely.
7. Execution Loop
Enter map, path directly toward the Ultimatum encounter (Trialmaster).
Trigger the encounter, don't over-commit to full clears since Ultimatum is "get in, cash out, get out."
Pick mods according to your Blood Magic status tier list.
Complete 10 waves for maximum rewards, or bail early with partial rewards if you're dying.
If Trial Master is spawning (T14+) and Trial Master uniques are cheap enough to justify, complete the boss fight for unique drops.
Loot Inscriptions, Catalysts, and rare drops. Price-check every Inscription individually.
Repeat, prioritizing volume over perfect execution.
8. Selling Strategy
Inscriptions - Always price-check individually. T0 Inscriptions (Bino's tier) can hit 10+ Divines during peak week. T1 and T2 Inscriptions like Rapid Globe sell for 5 to 10 Divines. Never bulk-vendor Inscriptions blind.
Catalysts - Bulk-sell in stacks of 10 or 20 for consistent income. Tainted Catalysts sell individually at 2 to 5c each.
Trial Master Uniques - List Glimpse of Chaos, Machinations, and Altar of Temptation support gems individually during days 1 to 7 when prices are inflated. Hateforge and lesser drops can bulk-sell.
Ultimatum Scarabs - If you're not running them yourself, sell them off since the market values Bribings and Catalyzing highly in early league.
PoE 3.29 Best Atlas Tree & Mapping Plans for SSF (To Be Updated)
Solo-Self Found players face a different set of challenges, fewer trade opportunities and the need to self-farm all gear. Here's are the most effective atlas and mapping strategies for SSF in the 3.29 league:
1. PoE 3.29 Breach SSF Atlas & Farming Strategy (Early Gear, Fileborn Currency & Target-Farm Uniques)
Breach is arguably the single strongest early-league farming mechanic in SSF for Path of Exile 3.29 Curse of the Allflame, and its role becomes even more critical without access to trade. Unlike trade-league Breach farming, which prioritizes raw currency and Breachstone sales, SSF Breach farming is a multi-purpose engine that simultaneously solves three of the biggest SSF pain points: getting your first set of usable gear (high-life, multi-resistance rare bases), target-farming build-defining Uniques that you'd otherwise never see drop, and generating the specific currency subtypes you need for crafting (including the new Fileborn currency from the Allflame mechanic). The mechanic is uniquely well-suited to SSF because the Atlas tree lets you weight your Breach rewards toward exactly what your build needs right now, whether that's a specific ring slot, amulet mods, Fileborn Regals for hybrid crafting, or fractured bases for endgame crafting. It's also one of the few strategies that stays profitable and useful from the moment you hit maps all the way through late-game Voidstone hunting, because the Breach tree scales cleanly with your gear and clear speed rather than requiring a specific investment threshold. On hardcore SSF specifically, Breach shines because Hive fortresses are self-contained encounters you can bail from if things go sideways, making it far safer than juiced map mechanics that can chain-explode on you.
1. Understand Why Breach Is the SSF Priority
Before allocating a single Atlas point, understand what Breach actually gives you in SSF that no other mechanic can match:
First-set gear: Breach reliably drops rare bases with high life and multiple resistances, exactly what you need to hit your four Voidstones on a half-decent league starter without begging for trade upgrades.
Target-farm Uniques: You can bias the Atlas tree to drop a specific slot's Uniques (rings, amulets, boots, etc.), which is critical for recipes like Taming (which requires three specific rings, one of which is genuinely rare and unrealistic to see naturally).
Fileborn currency for crafting: The new Allflame mechanic introduces Fileborn currency variants, and Breach can be tree-biased to drop these. A Fileborn Regal Orb spamming two good mods onto a chest is legitimately build-changing in SSF.
Fractured bases for endgame crafting: Later in the league when you're crafting real endgame gear, fractured items become critical, and Breach is one of the few reliable sources.
Breach is not just "a farming strategy" in SSF, it's the foundation layer underneath every other SSF activity you'll do this league.
2. Build the Early Atlas Tree
Your early Atlas passive tree should combine Breach as the core with several "always-include" SSF utility nodes:
Full Breach cluster as the primary allocation, take every Breach node available (increased Breach spawns, extra Clasped Hands, increased Breach monster density, Breachstone drops, and Blessing drops).
Guardian and Shaper map nodes are essential for SSF, you can never have enough Guardian/Shaper maps because you can't buy them, and you'll need them for Voidstone progression regardless of your primary farm.
General map sustain nodes near your Atlas start (Shaping the Mountains, Shaping the Skies, Shaping the World) to keep your map pool alive without trade backup.
Eater of Worlds or Searing Exarch Altar nodes (pick one), Altars provide free rerolls and currency drops on the fly, and one of them is always worth including.
Delve nodes (recommended for hardcore SSF specifically) for Fossil access and unique node farming, Delve pairs cleanly with Breach because it doesn't compete for map real estate.
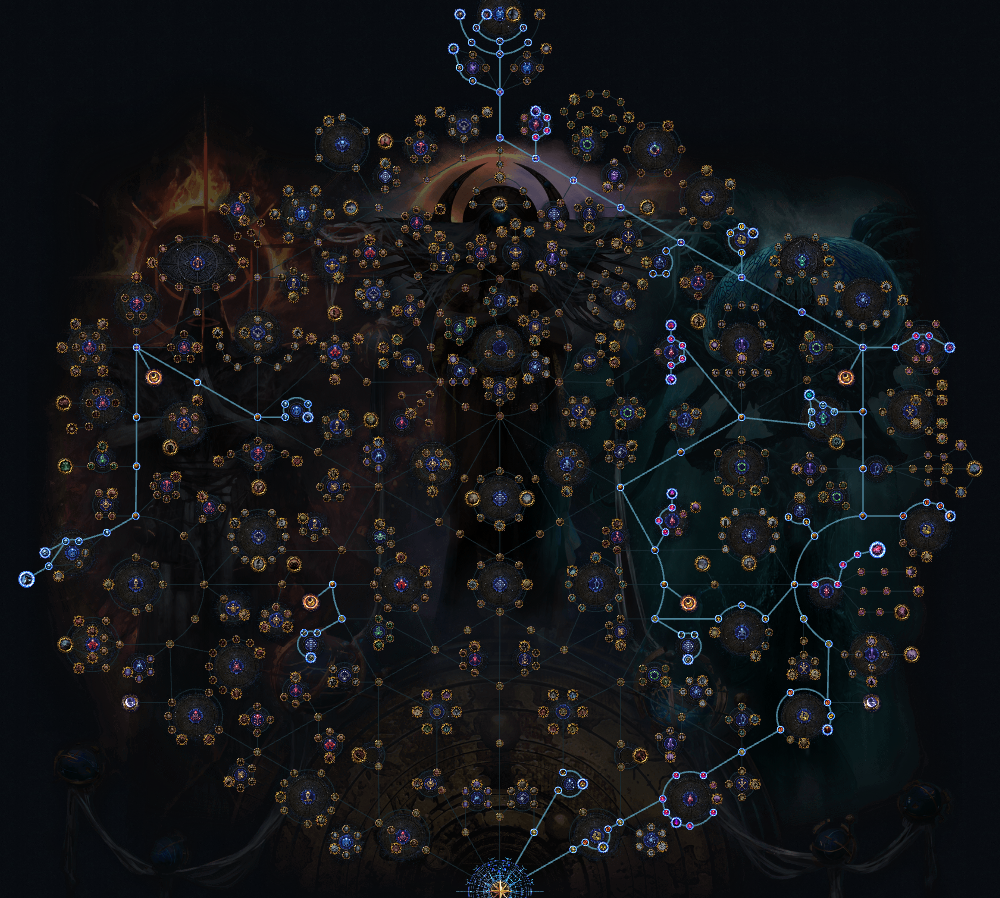
3. Choose Your Secondary Mechanic Wisely
Once your Breach core is set, you'll have leftover Atlas points to spend on a secondary mechanic. The critical principle here is: don't slow down your maps by stacking mechanics that require in-map time investment. Breach itself (especially Hive fortresses) already takes significant time per map, so pairing it with another slow mechanic destroys your maps-per-hour rate. Good secondary choices for SSF Breach include:
Betrayal is one of the best pairings because it's a passive drop-based mechanic that generates Scarabs (which SSF players can't buy) and unlocks crafting bench access, meaning it adds value without adding map time.
Ritual (via King's March Orbs) is worth experimenting with, King's March Orbs accumulate passively and give you a reason to run Rituals when they appear, but you're not obligated to engage every map.
Unique Maps progression (Trin's questline and similar) is essential in SSF since you can't buy the crafts and completion rewards, block out the ones you don't need and boost drop rates for the ones you do.
Avoid pairing Breach with Harvest, Delirium, or Legion in early SSF, all three add significant map time and compete for the same "encounter time" budget that Breach already consumes.
4. Configure the Rare Modifier Tree (Gear Bias)
This is where SSF Breach farming becomes truly powerful, the Atlas tree lets you bias rare drops toward specific slots and mods. Set it up based on your current gear gap:
Click the specific slot you need (e.g., Amulet if your neck is your worst piece).
Do not click other gear slots you don't need, this dilutes your bias.
Click Increased chance of Life and Critical modifiers if life and crit are what your build wants right now.
Click Reduced chance for Resistance modifiers if you're already getting resistances from other pieces (this is counterintuitive but correct, reducing resistance chance concentrates rolls onto the mods you actually need).
Reconfigure this weekly as your gear improves, once you have a good amulet, switch the bias to whatever your new worst slot is.
5. Configure the Unique Tree (Target-Farm Setup)
Do the same targeted allocation for Uniques based on what your build needs:
If you're farming rings for Taming (or any other multi-Unique recipe), click rings in the Unique tree.
Take Reduced chance to be Fileborn on Uniques if you specifically need a non-Fileborn version (Fileborn Uniques don't work for vendor recipes).
Take Increased Rarity of Unique drops to bias toward rarer Uniques rather than commons you already have five copies of.
When you crack a Clasped Hand, it pops out a few Uniques from the biased pool, keep rerolling maps until you hit the specific one you're farming.
6. Configure the Currency Tree (Fileborn Focus)
For 3.29 specifically, Fileborn currency is highly valuable for crafting because it enables new hybrid crafting outcomes:
Click Fileborn currency in the currency portion of the tree to weight drops toward Fileborn variants.
If you don't want Fileborn currency (e.g., you're prioritizing generic crafting orbs), do the inverse, click out of Fileborn and into standard currency nodes.
This is one of the fastest tree reconfigurations you'll make throughout the league, adjust it every time your crafting goals shift.
7. Map Selection and Rolling
For SSF Breach, keep map choice simple and volume-focused:
Any T14-T16 map works, don't waste time hunting for a "perfect" layout in SSF where map pool is limited.
Roll for Pack Size and Item Quantity with whatever currency you have on hand, don't waste Chaos or Divines trying to 8-mod corrupt in the first few days.
Prioritize maps with open layouts (Cemetery, Dunes, City Square) if you have them, but don't skip completion maps just because the layout isn't ideal.
Save Guardian/Shaper maps for Voidstone progression, not for Breach farming.
8. Run Hives (Breach Fortresses) as Your Primary Encounter
The Breach fortress encounters (the 25+ wave "Hive" defense events) are the highest-value Breach content per map:
Run around the inner square first, this is the ring just inside the outer perimeter and just outside the center, and it contains the majority of the hidden chests.
Hidden chests are the primary source of Womb Gifts and rare Fileborn Unique drops, so skipping them costs you the highest-EV loot in the entire encounter.
Only push to the outer square if you have time to spare, the outer ring has diminishing returns per second spent.
Skip the actual center unless you're specifically hunting a boss reward, most of the loot is in the ring formations.
9. When to Switch to Unstable Breaches
Hives are the SSF default, but there are situations where Unstable Breaches (the traditional Breach encounters that spawn from the ground) are better:
If your maps are running too slow because Hives are eating your time budget, swap the tree bias toward Unstable Breaches for faster completion.
If you're adding Breach Scarabs, always run Unstable Breaches, you can have multiple Unstable Breaches per map, and Breach Scarabs multiply per-encounter value rather than per-Hive value.
The rare Scarab that makes each subsequent Unstable Breach better is powerful but not worth prioritizing in hardcore SSF, it's a diminishing-returns investment when your maps are already dangerous.
10. Scarab Setup for SSF
SSF Scarab setup is dramatically simpler than trade because you use what drops:
Slot Breach Scarabs whenever they drop (Scarab of the Dreamer, Scarab of Snares, or whatever variant you have).
Fill remaining slots with generic Pack Size or Quantity Scarabs you have lying around, don't hoard Scarabs waiting for the "perfect" setup.
Atziri fragments work well as filler if you have them, they're cheap in SSF terms and boost pack size.
Do not delay maps waiting for optimal Scarab combos, SSF is a volume game.
11. Iterate the Tree Weekly
The single biggest SSF Breach mistake is setting the tree once and never touching it again. Reconfigure the biased trees (gear, Unique, currency) every time your build state changes:
Just crafted a great amulet? Switch the gear bias to your next-worst slot.
Just got Taming ring #1 of 3? Keep the Unique tree on rings but adjust the sub-bias if needed.
Building up currency for a specific craft? Switch the currency tree toward whatever orb you're spending most.
Treat the Atlas tree as a live configuration, not a permanent setup. Ten minutes of reconfiguration per session can dramatically shift your progression speed.
Other SSF-Focused Atlas Tree Strategies (Post-Launch Updates Coming):
Bestiary + Talisman for Gear Slots: With Talismans now dropping from Beasts and having enchantment-based modifiers (like plus one to gem levels), Bestiary becomes a strong gearing loop for SSF. You can farm specific Beasts to craft targeted Talismans, giving you deterministic amulet-slot power.
Abyss for Jewels and Stygian Vises: Since Abyss is now the exclusive source of Abyssal Jewels and Stygian Vises, allocating Atlas passives here gives you a targeted source of build-defining jewels. The new Abyss Pinnacle Boss also drops new unique items useful in SSF.
Legion + Enshrouding Crystals for Unique Gambling: In SSF where you can't buy specific Uniques, Legion's new Enshrouding Crystal system is a way to gamble one Unique into another of the same slot with a Vestigial implicit. This is huge for hitting build-defining chase items.
Essence for Deterministic Crafting: Essences remain one of the strongest early-game crafting materials in SSF. Focus Atlas nodes here for reliable multi-resistance and high-life gear needed for red map progression.
Delve for Fossils: Fossils continue to be one of the best deterministic crafting methods in SSF. Investing Nico nodes early is a solid setup for both bulk fossils and unique modifier crafting.
Heist for Rogue Markers, Enchants, and Bases: Fully revealed blueprints (from the buffed Dutiful Soldier node with its new 15% special implicit chance) let SSF players target endgame bases, replicas, and enchantments that are otherwise hard to get.
Expedition for Currency Artifacts: Expedition remains a top raw-currency mechanic in SSF thanks to Tujen and Dannig's shops, especially since you can convert artifacts into orbs you need.
New Allflame Crafting for Deterministic Gear: The new crafting system that shows multiple outcomes and lets you pick the one you want is huge for SSF, where crafting currency is scarce. Even rare currency like Fracturing Orbs or Exalted Orbs become far more usable when you can preview and choose outcomes.
SSF players benefit most from being selective. Investing heavily in map sustain and build-compatible league mechanics rewards specialists rather than jack-of-all-trades trees. Mirroring trade strategies might be tempting, but focusing on sure-return mechanics like Bestiary, Essence, and Delve remains more reliable for self-found play, particularly before powerful endgame gear is in hand. Complete SSF strategies and dedicated tree layouts will be published here once 3.29 launch data is available.