Which maps to scary for Divination Cards and Consistent Drops in PoE 3.27 Keepers of the Flame? Find out the answer with our Path of Exile 3.27 Map Tier List. Here, we present the map tier list and recommend the best maps to farm if your goal is to see steady returns from Div Card drops.
Path of Exile 3.27 Map Changes
Path of Exile 3.27 brought several updates to the Atlas and map system:
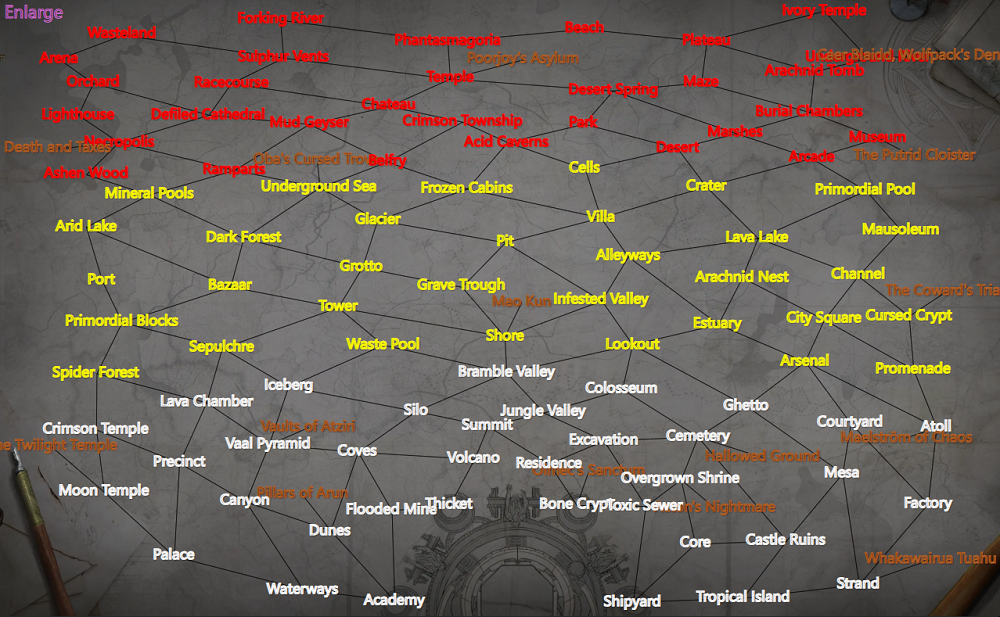
Map tiers and locations have been shuffled, most maps are now found at different tiers, although their "pin" locations remain the same.
The Atlas Passive Tree underwent a comprehensive rework: its layout changed, and you can now refund all invested Atlas passive points using gold.
Some small Atlas passives now grant increased Rarity of Items found in your Maps instead of affecting Explicit Modifiers, and the Mining Byproducts Notable now increases the chance for Voltaxic Sulphite Veins and Chests to contain double Sulphite.
Tier 17 maps can be corrupted to have up to 8 modifiers, and Abyss Scarabs have new mechanics associated with Minor Stygian Spires.
The league mechanic is an updated Breach system: Breach Hands and Breach Hives appear, providing new monster encounters and opportunities to fight Breachlords.
New crafting items and systems have arrived, such as Foulborn Uniques and the Genesis Tree, adding more depth to item progression.
Heist rogues now start at their maximum level, and you can refund all passive points using gold.
Keep in mind that map tiers are rebalanced each league, affecting Atlas progression and farming strategies.
PoE 3.27 Map Tier List
The 3.27 league features a new map tier lineup. Here’s a summary of the tiers and notable maps for each:
Tier 1: Bone Crypt, Shipyard, Thicket, Academy
Tier 2: Dunes, Volcano, Toxic Sewer, Waterways, Flooded Mine, Tropical Island, Core, Residence
Tier 3: Overgrown Shrine, Strand, Excavation, Palace, Coves, Castle Ruins, Summit, Canyon
Tier 4: Cemetery, Moon Temple, Vaal Pyramid, Jungle Valley, Mesa, Precinct, Factory, Silo
Tier 5: Atoll, Courtyard, Lava Chamber, Colosseum, Bramble Valley, Iceberg, Ghetto, Crimson Temple
Tier 6: Shore, Promenade, Arsenal, Lookout, Spider Forest, Waste Pool, Sepulchre
Tier 7: Cursed Crypt, Tower, Infested Valley, Grave Trough, City Square, Primordial Blocks, Estuary
Tier 8: Alleyways, Grotto, Channel, Port, Arachnid Nest, Pit, Bazaar
Tier 9: Mausoleum, Dark Forest, Arid Lake, Glacier, Villa, Lava Lake
Tier 10: Underground Sea, Primordial Pool, Mineral Pools, Cells, Frozen Cabins, Crater
Tier 11: Arcade, Ashen Wood, Belfry, Ramparts, Acid Caverns, Desert
Tier 12: Museum, Necropolis, Mud Geyser, Park, Crimson Township, Marshes
Tier 13: Defiled Cathedral, Lighthouse, Desert Spring, Burial Chambers, Chateau
Tier 14: Temple, Maze, Racecourse, Orchard, Arachnid Tomb
Tier 15: Underground River, Sulphur Vents, Plateau, Arena, Phantasmagoria
Tier 16 (Endgame Core): Ivory Temple, Beach, Forking River, Wasteland
Tier 17 (Uber Endgame): Sanctuary, Citadel, Fortress, Abomination, Ziggurat
PoE 3.27 Best Maps to Scry (Farm)
When choosing which map to scry for Divination Cards, many players are looking for a balance between card value and frequency. While some cards like The Apothecary or Mirror Shard promise massive payouts, their extremely low drop rates can make farming feel unrewarding over long stretches. Instead, targeting maps with more common, valuable cards leads to a more steady stream of returns.
Below are top map choices for scrying in 3.27, along with reasons each is effective:
1. Dunes
Mob Count: 460 (mid-high for its tier)
Layout: Open, very linear, excellent for fast clears and Breach/Legion mechanics.
Boss: Simple boss at map end, outdoors, easy to rush.
Density: Above average for a T2 map, making it great for Altars and pack-based content.
Notable Div Cards: The Fortunate (good value and frequency), The Patient (with scrying), and solid base currency drops.
Dunes is consistently a top pick for Div Card farming due to its highly linear, open layout, minimal obstacles, and outdoor environment. This map allows extremely fast clears, making it efficient for running large numbers of maps in a session, which is ideal for maximizing card drops. The boss is located right at the end and is very easy to defeat, so you lose little time on each run. The mob density is above average for its tier (460 per run based on the mob count spreadsheet), ensuring plenty of opportunities for Altar and pack-based mechanics. “The Fortunate” card drops here with good frequency, offering a steady income of Divine Orbs, and players often report “dopamine pops” from regular card drops. The map is also great for mechanics like Breach and Legion due to its open nature.
2. Mesa
Mob Count: 432 (high for its tier)
Layout: Circular, highly efficient, boss accessible right at the end.
Boss: Oak the Mighty—very easy, minimal mechanics.
Features: Excellent for running Blight and Delirium; few obstacles.
Notable Div Cards: The Fortunate, Blight-specific cards.
Mesa stands out for its compact, circular arena layout and very high clear speed. The boss, Oak the Mighty, is trivial and quick to access, further improving efficiency. The map is excellent for Blight and Delirium mechanics thanks to its open, predictable design and absence of annoying obstacles. With 432 average mobs per run, density is strong for its tier. Div Card drops like “The Fortunate” are common here, so you can expect regular payout. Community feedback notes this map as “surprisingly easier than Tier 3 Springs Oak,” and it’s especially popular for those who enjoy bulk mapping with minimal downtime.
3. Strand
Mob Count: 369 (lower, but compensated by fast clear and linear layout)
Layout: Perfectly linear beach map, fast to clear, great for racing.
Boss: At the end of the map, easy to access and defeat.
Features: Few obstacles, outdoors.
Notable Div Cards: The Patient, Brother’s Gift (with scrying), and other mid-value cards.
Strand has a perfectly linear, outdoor beach layout with no dead ends, so it’s one of the fastest maps to clear in the game. While the mob count (369 per run) isn't the highest, the layout efficiency more than makes up for it. The boss is at the very end and easy to reach, with little time spent detouring from the main path. Its popularity comes from being ideal for speed mapping, including “ping-pong” scrying strategies (swapping between Defiled Cathedral and Strand, for example). Div Cards like “The Patient” and “Brother’s Gift” (if scried) drop here, and players enjoy a steady flow of moderate-value cards with very little frustration.
4. Defiled Cathedral
Mob Count: Not listed, but high density based on map size and pack scaling.
Layout: Large cathedral, multiple rooms and wings.
Boss: Apothecary and Mirror Shard can drop here (via scrying), making it top-tier for high-end gambling.
Features: Indoors, moderate obstacles, but high monster density and card potential.
Notable Div Cards: The Apothecary, Mirror Shard, Seven Years Bad Luck.
This map is legendary for high-value Div Card farming. While the monster count isn’t specified, the map is large, with a multi-room layout and high pack density—especially when juiced with mechanics. The real attraction is the potential for “jackpot” cards like The Apothecary and Mirror Shard, as well as Seven Years Bad Luck. While drops can be rare, this map shines over long farming sessions and is favored by those who don’t mind the wait for big payouts. It’s consistently at or near the top of Div Card value rankings according to sites like mapsofexile.com and is highly recommended for those who enjoy high-stakes farming.
5. Villa
Mob Count: 632 (very high for T9)
Layout: Moderate linearity, open villa grounds.
Boss: Straightforward with minimal mechanics.
Features: Outdoors, few obstacles.
Notable Div Cards: Brother’s Gift, Fracturing Orbs.
Villa boasts an extremely high mob count for its tier (632 per run), which directly boosts your chances for both Div Cards and altar-based rewards. The layout is open and largely outdoors, making it easy to apply mechanics like Legion, Ritual, and Delirium. The boss fight is straightforward, so very little time is spent not killing packs. Villa is notable for “Brother’s Gift,” which drops with better frequency than in most other maps, and also offers a shot at Fracturing Orbs. The combination of density, card pool, and farming speed makes it a favorite for consistent, moderate-value returns.
6. Residence
Mob Count: Not listed, but moderate for T2.
Layout: Indoors, multi-room, but not maze-like.
Boss: Three bosses, manageable mechanics.
Features: Good for Delirium, moderate obstacles.
Residence is a reliable choice for those seeking steady Divine Orbs via the Sephirot card. The map features a multi-room, but non-maze, indoor layout, which allows for predictable clearing. There are three bosses, but their mechanics are manageable and don’t slow down farming much. While the exact mob count isn’t listed, density is moderate for a Tier 2 map. The map is well-suited for Delirium and other pack multipliers, and the Sephirot card is known for its relatively frequent drops (roughly once every 26 runs), making it popular for players wanting consistent, not just jackpot, rewards.
7. Lava Chamber
Mob Count: Not directly listed, but above average.
Layout: Open, moderate obstacles.
Boss: Divine Beauty Div Card drops here, boss is straightforward.
Features: Indoors, but not maze-like.
Lava Chamber is prized for its regular payout of valuable currency cards, especially “Divine Beauty,” which drops about once every 18 maps. The layout is mostly open, with moderate obstacles but not enough to slow down clear speed. The boss is straightforward and not time-consuming. This map is a great target if you want frequent Divine Orbs without the massive dry spells associated with rarer cards. The density is above average, which supports strong altar and pack-based farming.
8. Promenade
Mob Count: Not directly listed, but efficient.
Layout: Linear, easy to clear.
Boss: End of map, simple to kill.
Notable Div Cards: The Patient.
Promenade’s linear layout lends itself to very efficient mapping, with little to no backtracking or wasted time. The boss is at the end for quick access, and the map is a favorite for bulk farming strategies. “The Patient” card drops here, and while the card value is moderate, its frequency leads to a steady accumulation of currency. For players who like a no-nonsense, quick-clear map with consistent returns, Promenade is a solid choice.
9. Factory
Mob Count: Not directly listed, but high density.
Layout: Open, some obstacles.
Boss: Simple.
Notable Div Cards: The Fiend (very valuable), Fortress.
Factory is highly regarded for its excellent mob density, which boosts both card drop chances and altar effectiveness. The layout is open, and the boss is easy to access. This map can be run in rotation with Dunes to maximize the chances for “The Fiend” (one of the most valuable Div Cards) and “Fortress.” Factory’s combination of high-value cards, density, and speed makes it a staple for serious Div Card farmers.
10. Cemetery
Mob Count: High (noted in many references as dense).
Layout: Open, outdoors, good for Legion and Breach.
Boss: Multiple bosses.
Notable Div Cards: The Nurse (Headhunter card).
Cemetery features high mob density and an open, outdoor layout, making it fantastic for pack-based mechanics such as Legion, Breach, and Ritual. The map typically contains multiple bosses, which can slow things slightly but also increases chances for certain drops. “The Nurse” Div Card (Headhunter) drops here, and while it’s not as rare as The Doctor, it provides a reliable source of value through regular farming. Its popularity is backed by years of community farming results.
11. Crimson Temple
Mob Count: High.
Layout: Indoors, but with clear paths and few dead ends.
Boss: Can drop The Apothecary.
Notable Div Cards: The Apothecary (Mageblood), The Fiend, Seven Years Bad Luck.
Crimson Temple is packed with monsters, has a clear path, and minimal dead ends despite being indoors. The map is famous for dropping The Apothecary (Mageblood), The Fiend, and Seven Years Bad Luck. While these cards are rare, the map’s density and layout make it one of the best for juiced mapping, especially if you’re running with Scarabs and other pack multipliers. It’s a favorite for endgame Div Card hunters.
12. Moon Temple
Mob Count: 602 (high).
Layout: Open, easy to clear.
Boss: Simple, outdoors.
Notable Div Cards: The Encroaching Darkness, The Scholar.
With a mob count of 602, Moon Temple is among the densest for its tier. Its open layout allows for quick clears and smooth movement. The boss is simple and outdoors, and the card pool includes several mid-value cards. The high pack count makes it excellent for farming with altar or Delirium strategies, and it’s enjoyable to run in bulk.
13. Colosseum
Mob Count: 671 (very high for T13).
Layout: Open arena.
Boss: Moderate difficulty.
Notable Div Cards: The Gladiator, The Enlightened.
Colosseum boasts one of the highest mob counts in the game (671 per run), making it ideal for juiced mapping and altar farming. The open arena design means you’re always fighting, with minimal downtime spent running between packs. The boss is of moderate difficulty, but the overall returns from pack-based Div Card drops and loot are excellent. It’s a great choice for those looking to maximize their altar or Delirium returns.
14. Flooded Mine
Mob Count: 621 (high).
Layout: Linear, easy to clear.
Boss: Simple mechanics.
Notable Div Cards: The Fathomless Depths.
Flooded Mine features a linear layout and very high mob density (621 per run), which is ideal for efficient, high-reward farming. The boss is easy, and the map is well-suited for Delirium mirrors and other league mechanics that reward density. Div Cards like “The Fathomless Depths” drop here, and the map’s straightforward design makes it a top pick for fast, consistent farming.
15. Bazaar
Mob Count: 656 (very high for T7).
Layout: Open market, some obstacles.
Boss: Not difficult.
Bazaar stands out for its extremely high mob count (656 per run) and open market layout, which is perfect for maximizing Div Card and altar rewards. The map is popular for running Legion, Delirium, and Ritual due to its density and openness. Although the Div Card pool isn’t as premium as some other maps, the sheer number of packs means steady, reliable returns and lots of opportunity for altars and league mechanics.